How to Remove Stains from Cutting Boards?
Your cutting board gets a workout every single day in the kitchen. You slice vegetables, cut raw meat, chop herbs, and press garlic on that same surface. Over time, stains show up. Some are light and easy to miss. Others are stubborn and seem to laugh at your cleaning attempts. If you’ve ever stared at your cutting board and wondered how to get those annoying marks off, you’re in the right place.
In this article
This guide walks you through everything you need to know about stain removal for cutting boards. You’ll learn simple methods that work, what causes stains in the first place, and how to keep your cutting board looking fresh for years to come.
Why Your Cutting Board Gets Stained So Easily
Before you start scrubbing, it helps to understand what’s actually happening to your cutting board. Stains form because of the nature of the materials used to make cutting boards and the foods you prepare on them.
Cutting boards are porous. This means they have tiny holes and spaces throughout their surface. When you cut foods on the board, the juices and pigments from those foods seep into these tiny spaces. Over time, this staining builds up.
Different foods cause different types of stains. Red foods like tomatoes, beets, and red peppers leave red stains. Dark foods like beets and berries leave purple or brown stains. Some foods like turmeric create bright yellow or orange stains that are particularly noticeable. Even regular vegetables like onions and garlic can leave marks if they sit on the board long enough.
The type of cutting board you own also matters. Wooden boards are more porous than plastic boards, so they stain more easily. Bamboo boards fall somewhere in the middle. The grain pattern in wood also shows stains more obviously because the stain tends to settle in the grooves.
The Easiest Fresh Stain Method
If you catch a stain right after it happens, you have the easiest job. Fresh stains haven’t had time to sink deep into the board yet. Here’s what to do.
First, rinse your board with hot water. Don’t use cold water because hot water helps open up the pores of the board slightly. Let the warm water run over the stained area for a few seconds.
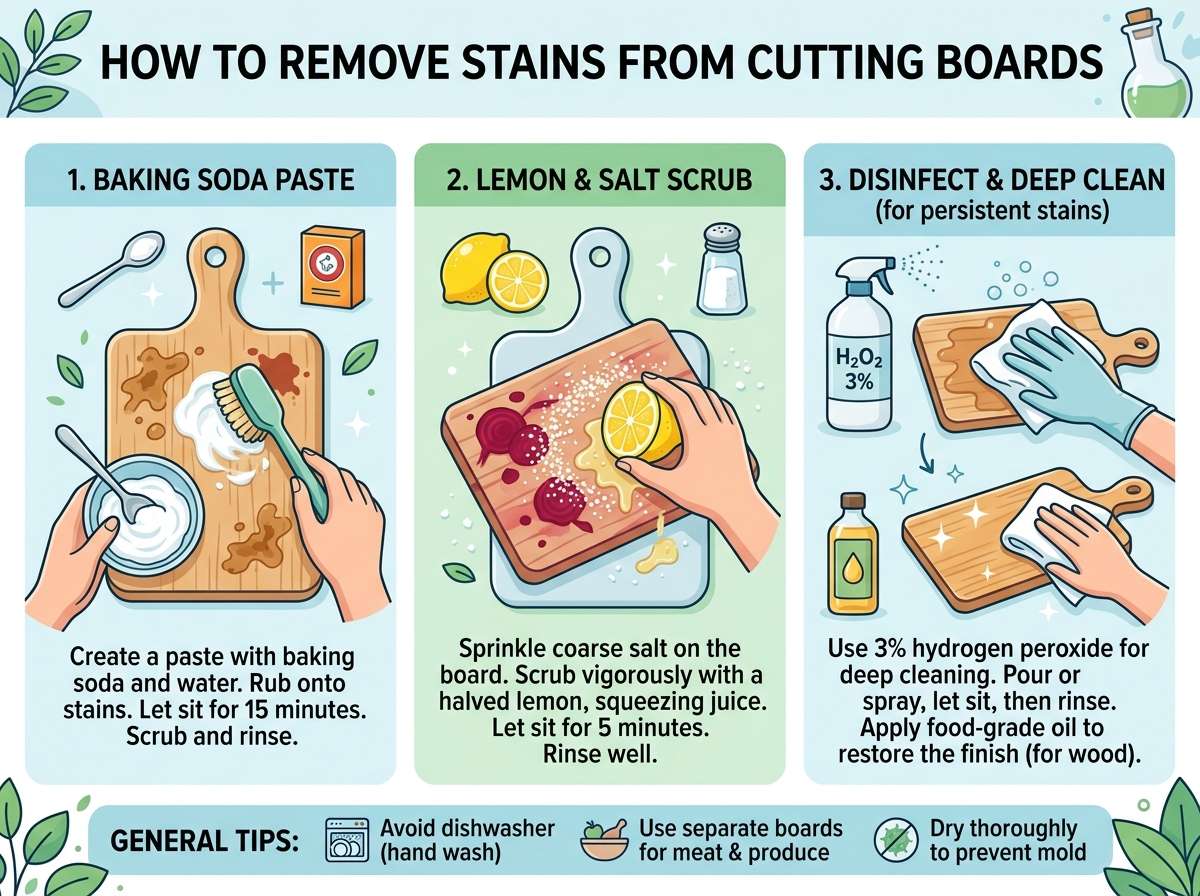
Next, sprinkle salt directly onto the wet stain. Use regular table salt or coarse salt. Don’t be shy with the amount. Cover the entire stained area with salt. The salt acts like a gentle scrub that lifts the stain before it sets in.
Now grab a cut lemon or lime. Squeeze the juice directly onto the salt. The acid in the lemon works with the salt to lift the pigment out of the wood fibers. This combination is powerful but gentle enough that it won’t damage your board.
Take a soft cloth or sponge and rub the area in circular motions. You should start to see the stain lifting away almost immediately. This works best on fresh stains because the pigment hasn’t bonded completely to the wood yet.
Once the stain is gone, rinse the board well under hot water. Make sure you get all the salt off because leftover salt can draw moisture out of the wood.
The Baking Soda and Vinegar Method
This method works great when you haven’t caught the stain right away. Baking soda is a mild abrasive that gently lifts stains without scratching your board. White vinegar adds extra cleaning power.
Start by wetting the stained area with water. You want the board damp but not dripping wet. Sprinkle baking soda generously over the stain. Try to cover the entire stained spot.
Pour white vinegar onto the baking soda. You’ll see it start to fizz and bubble. That fizzing action is what breaks down the stain. The bubbles work their way into the pores of the board and help lift out the stain particles.
Let this mixture sit for five to ten minutes. You don’t need to wait longer than this because the reaction happens quickly. If you leave it too long, the vinegar just soaks into the board without adding extra benefit.
Now scrub the area with a soft brush or cloth. Use gentle, circular motions. Push harder on stubborn stains, but don’t go crazy because you don’t want to scratch your board. After scrubbing for a minute or two, rinse everything away with hot water.
This method works on both fresh and older stains. If the stain is still visible after one round, you can repeat the process a second time. Most stains disappear after two applications.
Using Hydrogen Peroxide for Tough Stains
When regular methods don’t work, hydrogen peroxide comes to the rescue. The kind you buy at the drugstore works perfectly. This method is especially good for set-in stains that have been on your board for days or weeks.
Pour a small amount of hydrogen peroxide directly onto the stain. You don’t need much. Just enough to cover the stained area. Let it sit for a few minutes. You might see some bubbling, which is the peroxide breaking down the stain.
After a few minutes, scrub gently with a soft brush or cloth. The peroxide loosens the stain so your scrubbing is more effective. Rinse well with hot water to remove all the peroxide.
If the stain is still there, repeat the process. Some really stubborn stains might need three or four applications, but this method usually works. The nice thing about hydrogen peroxide is that it’s safe for both wood and plastic boards, and it doesn’t damage the cutting surface.
The Bleach Method for White Plastic Boards
If you own a white plastic cutting board and stains are ruining its appearance, bleach can help. This method only works on plastic boards, and it works best on white or light-colored plastic. Never use bleach on wood or bamboo boards because it will damage them.
Mix one part bleach with ten parts water. This dilutes the bleach enough to be safe for your board while still being strong enough to remove stains. You can make this in a spray bottle for easy application.
Spray the solution onto the stained areas of your plastic board. Let it sit for about five minutes. The bleach breaks down the stain molecules, making them disappear.
After five minutes, scrub lightly with a soft brush. Plastic boards are softer than wood, so you need to be gentler when scrubbing. Rinse everything away very thoroughly with lots of water. You want to remove all traces of bleach because you don’t want any bleach residue on food-contact surfaces.
This method works fast on plastic boards, but remember it only works on plastic. Wood and bamboo boards will be ruined by bleach.
The Oil and Salt Method for Wooden Boards
This is an old-fashioned method that works surprisingly well on wooden cutting boards. Oil and salt together create a gentle but effective cleaning paste that lifts stains while also conditioning your wood.
Wet your cutting board with a little water. Pour a small amount of vegetable oil, olive oil, or coconut oil onto the stained area. Any of these oils will work. Next, sprinkle salt on top of the oil.
Use a cloth to rub the oil and salt together in circular motions. The salt becomes like a gentle scrub while the oil helps lift the stain. After a couple of minutes of rubbing, you should see the stain starting to fade.
The bonus with this method is that the oil conditions your wooden board as you clean it. Wood needs oil to stay healthy and prevent it from drying out and cracking. So you’re cleaning and conditioning at the same time.
Rinse the board with warm water to remove the salt and most of the oil. Then wipe it down with a clean cloth. Your board will look better and feel smoother after this treatment.
Dealing with Deep Set Stains
Sometimes a stain has been on your board for so long that it feels permanent. These deep stains need a little more patience and extra effort, but they can still come out.
For deep stains, combine methods. Start with baking soda and vinegar. Let that work for ten minutes, scrub, and rinse. Then follow up with hydrogen peroxide. Apply it, let it sit for five minutes, scrub gently, and rinse again.
If the stain is still visible, repeat this combination one more time. Deep stains sometimes need multiple treatments because the pigment has worked its way far into the pores of the board.
Another approach for really stubborn stains is to make a paste. Mix baking soda with a little water to create a thick paste. Spread this paste over the stain and let it dry completely. As it dries, the paste pulls moisture from the stain. After it’s fully dry, scrub away the dried paste with a damp cloth. Rinse well.
This drying method works on stains that won’t budge with liquid treatments because the paste actually draws out the stain as it dries.
Prevention: Stop Stains Before They Start
The best way to deal with stains is to prevent them in the first place. A few simple habits keep your cutting board looking like new.
First, rinse your board immediately after use. Don’t let food sit on it. The longer food sits on the board, the deeper the stain sinks in. Rinsing right away prevents most stains from setting.
Second, use separate boards for different types of food. Have one board for raw meat, another for vegetables, and another for herbs and bread. This is smart for food safety reasons, but it also means any one board doesn’t get stained by a variety of different pigments.
Third, season your wooden boards regularly. Once a month, rub your wooden board all over with food-grade mineral oil or board conditioner. This keeps the wood sealed and less porous, which means stains don’t sink in as deep.
Fourth, use cutting boards that match the foods you’re cutting. If you cut beets and turmeric all the time, use a darker or patterned board where stains are less visible. This is partly practical and partly just accepting that some stains will happen and that’s okay.
Finally, wipe up spills as soon as they happen. If you spill beet juice or red wine on your board, wipe it up immediately. Those liquids stain faster than solid foods because they’re already liquid and soak in faster.
Choosing the Right Cutting Board to Resist Stains
If you’re in the market for a new cutting board, you can pick one that resists stains better. Not all boards are created equal when it comes to staining.
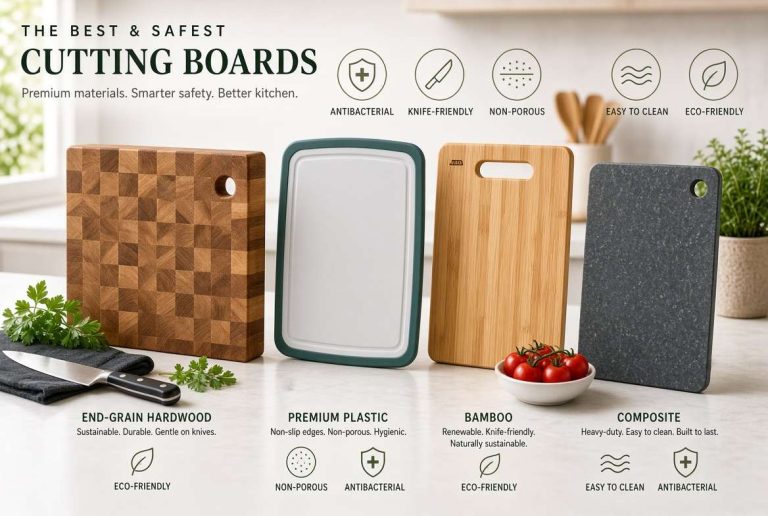
Plastic boards resist stains better than wood. The non-porous surface of plastic means stains don’t sink in as deep. However, plastic boards get cut more easily, and after a while they look worn.
Bamboo boards fall in the middle. Bamboo is harder than regular wood, so it resists cutting marks better. It’s also slightly less porous than wood, so stains don’t sink in quite as far. Bamboo boards often look great for years.
Glass cutting boards don’t stain at all because they’re completely non-porous. However, they’re hard on your knives and can be noisy to work on.
If you love the feel of a wooden board but want something stain-resistant, look for boards made from denser woods like maple or walnut. These woods are harder and less porous than softer woods, so they resist staining better.
What to Avoid When Cleaning Your Board
Just as important as knowing what to do is knowing what not to do. Some cleaning methods damage your cutting board.
Don’t use bleach on wood or bamboo boards. It will strip the color and damage the fibers.
Don’t use the dishwasher if your board is wood or bamboo. The heat and moisture will warp your board and cause it to split. Hand wash wooden boards only.
Don’t scrub with hard-bristled brushes on wood boards. This scratches the surface and can rough up the wood. Use soft cloths or soft-bristled brushes.
Don’t let wooden boards sit wet. After washing, dry them right away with a clean cloth. Standing water causes warping and mold growth.
Don’t use cream cleansers or scouring powders on any cutting board. These are too harsh and will damage the surface.
Don’t soak wooden boards in water. This causes the wood to absorb too much moisture and warp.
When It’s Time to Replace Your Board
Sometimes a cutting board gets so stained or damaged that it’s time to replace it. If your board has deep cracks, is warped, or has grooves that harbor bacteria, replacement is the right choice.
Deep cracks and grooves can harbor bacteria and are hard to clean properly. If your board is in this condition, it’s safer to replace it than to keep using it.
If your board is warped so badly that it doesn’t sit flat on your counter, it’s time for a new one. Warped boards are dangerous because they can shift while you’re cutting.
Heavily stained boards that won’t come clean might just be beyond help. Sometimes the stain is so deep and spread out that removing it is impossible. In this case, replacing the board is easier than continued frustration.
Quick Reference: Stain Removal Solutions
Here’s a quick guide to pick the right method for your situation.
For fresh stains, use salt and lemon. It’s the fastest method.
For old stains on wooden boards, try baking soda and vinegar first.
For really stubborn stains, use hydrogen peroxide or combine multiple methods.
For plastic boards with tough stains, use diluted bleach.
For boards that need conditioning at the same time, use oil and salt.
Natural vs Commercial Cleaners
You can remove stains with items already in your kitchen. You don’t need to buy special commercial cleaners. Salt, baking soda, vinegar, lemon, and oil all work beautifully.
If you prefer commercial products, they work too. There are board cleaners and conditioners made specifically for cutting boards. These are convenient if you want a one-step solution, but they’re not necessary. Your kitchen supplies do just as good a job.
The natural methods have the advantage of being cheaper and safer. You know exactly what’s on your cutting board, and nothing toxic is getting near your food.
The Science Behind Why These Methods Work
Understanding why these methods work helps you remember them and troubleshoot when something doesn’t work perfectly.
Salt and lemon work because salt is an abrasive that scrubs away stain particles, while lemon acid breaks down the pigment molecules.
Baking soda and vinegar work because the chemical reaction between them creates bubbles that penetrate the board’s pores and lift out stain particles.
Hydrogen peroxide works because it’s an oxidizing agent that breaks down stain molecules at a chemical level.
Oil works because it penetrates into the board’s pores and helps loosen pigment particles so they can be wiped away.
Bleach works on plastic because it chemically breaks down the pigment molecules that cause the stain.
Making Your Cutting Board Last Longer
Beyond removing stains, you can make your cutting board last much longer with good care.
Always hand wash your wooden board. The dishwasher is too harsh.
Oil your wooden board once a month. This keeps the wood from drying out and cracking.
Store your board standing up or flat, never leaning against a wall at an angle. Leaning causes warping.
Don’t leave your board near heat sources like radiators or sunny windows for extended periods.
Dry your board immediately after washing. Standing water damages wood.
Use a cutting board mat under your board when you’re using it. This prevents the board from moving around and also protects your counter.
Frequently Asked Questions About Cutting Board Stains
Can you remove stains from a plastic cutting board? Yes, plastic boards stain less easily than wood, but stains can still happen. Use baking soda and vinegar or diluted bleach on white plastic boards.
Is it safe to use bleach on my cutting board? Only on white or light plastic boards. Never use bleach on wood or bamboo. Rinse extremely well after bleach treatment.
How do you get turmeric stains off a cutting board? Turmeric stains are stubborn. Use hydrogen peroxide or combine baking soda and vinegar with multiple applications.
What’s the safest way to clean a cutting board? Salt and lemon or baking soda and vinegar are the safest methods because they use common food ingredients.
Why does my wooden cutting board keep getting stained? Wood is naturally porous. Regular oiling helps, but staining is normal. Wash and dry your board immediately after use to minimize staining.
Can you remove permanent stains from a cutting board? Some very old stains might not come completely out, but most can be lightened significantly with the methods described here.
Your Action Plan
Here’s what to do right now. Look at your cutting board. Are there stains you want to remove? If yes, pick a method based on how old the stain is and what your board is made from.
For your first attempt, try the salt and lemon method if the stain is fresh, or baking soda and vinegar if it’s older. These are the gentlest methods and they work on all board types.
After you’ve removed the stains, commit to one prevention habit. Maybe it’s rinsing your board immediately after use. Maybe it’s oiling your wooden board once a month. One habit makes a big difference.
Your cutting board is a kitchen workhorse. It deserves to look good. With these methods, you can keep it clean and stain-free for years. Most stains come out faster than you’d expect, and prevention keeps them from coming back.
Start today. Grab a lemon and some salt. That stain on your cutting board doesn’t stand a chance.

Mary is a home cooking enthusiast and kitchen gear reviewer with a passion for practical cookware and food preparation tools. She enjoys testing cutting boards, knives, kitchen gadgets, and other cooking essentials to help home chefs make smarter buying decisions. Through KitchenCutting.com, Mary shares honest product reviews, buying guides, and helpful kitchen tips to make cooking easier, safer, and more enjoyable.