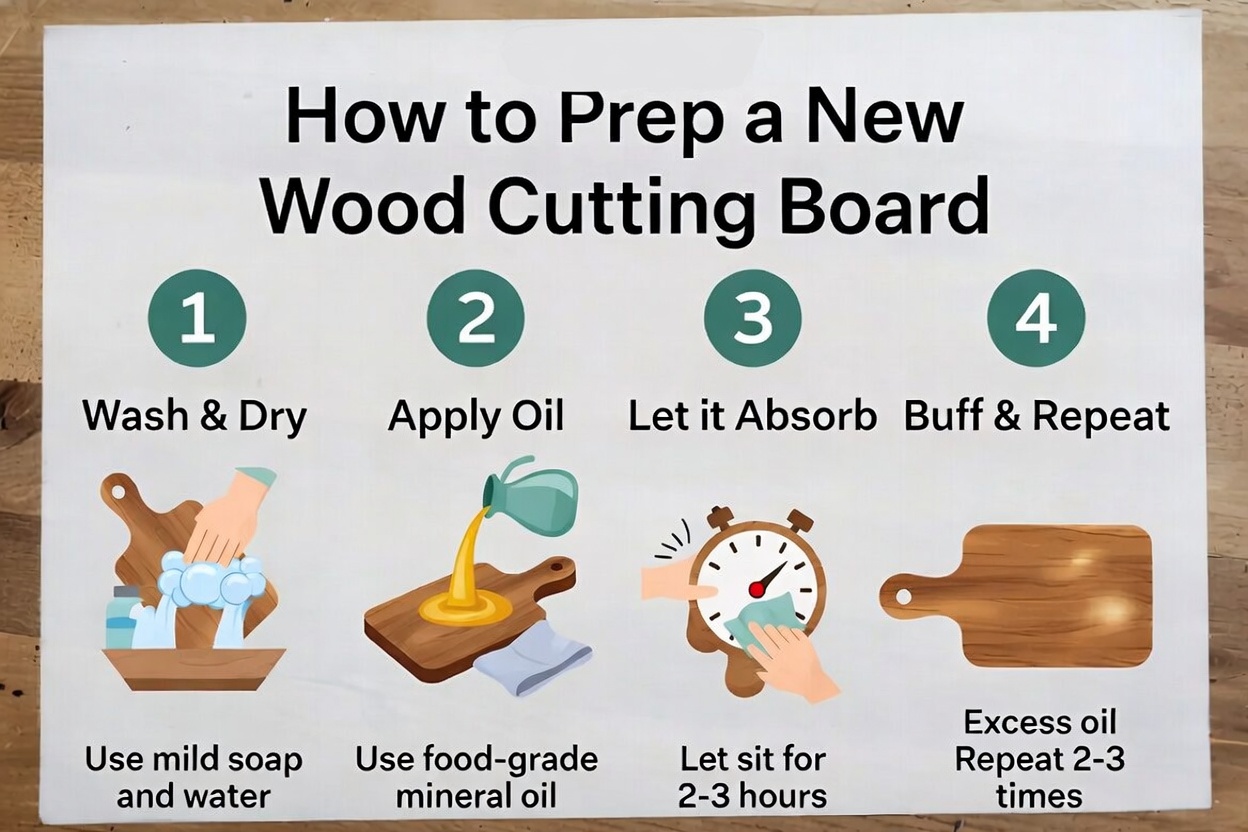
How to Prep a New Wood Cutting Board?
So you just got a brand new wood cutting board. You’re excited. You want to use it right away. But here’s the thing—before you start slicing up vegetables or carving meat, you need to prep it first. This prep work is super important, and it doesn’t take that long. Let me walk you through everything you need to know.
In this article
Why You Need to Prep Your New Cutting Board
Your new board might look perfect sitting in its box, but it’s not ready for the kitchen yet. Wood is a natural material. It can be dry, dusty, or even treated with stuff you don’t want on your food.
Prepping your board does a few things. It cleans away any dust or dirt from manufacturing. It fills the wood with oil so it stays strong and doesn’t crack. It also helps your board last way longer. Think of prepping like breaking in a new pair of shoes—you’ve got to do it right from the start.
A well-prepped board will look better, feel smoother, and actually perform better when you’re cutting. Plus, it smells amazing.
What You’ll Need Before You Start
You don’t need a ton of stuff. Here are the basics:
Food-Grade Mineral Oil
This is the MVP here. Food-grade mineral oil is safe for your family. It soaks into the wood and protects it. Make sure it says “food-grade” on the label. Don’t use regular mineral oil or mineral oil meant for other purposes. You want the kind made for wood cutting boards and wooden spoons.
Beeswax (Optional But Recommended)
Beeswax creates a harder, more durable finish on top of your board. It looks nice too. Think of it as the protective topcoat. Beeswax comes in blocks or pellets. You can mix it with mineral oil to create a paste.
A Clean Cloth or Paper Towel
You’ll use this to rub the oil into the wood. Lint-free cloths work best. Old cotton t-shirts work great if you cut them up.
A Small Jar or Container
This is where you’ll mix your mineral oil and beeswax if you decide to use both.
Warm Water and Mild Soap
You’ll want to give your board a gentle wash first. Regular dish soap works fine.
A Brush (Optional)
A soft brush helps scrub the board gently. Your hand works fine too.
Step-by-Step Instructions for Prepping Your Board
Step One: Give It a Good Wash
Start simple. Get your board wet with warm water. Not hot water—warm is better. Add a tiny bit of mild dish soap. Use your hands or a soft cloth to gently scrub the entire surface. Get both sides. Pay attention to the edges and any grooves.
The goal is to remove dust, dirt, and any manufacturing residue. This is a gentle wash, not a scrubbing mission. You’re not trying to strip the wood.
Rinse it really well with clean water. Keep rinsing until the water runs clear and you don’t see any soap bubbles anymore.
Now pat it dry with a clean towel. You want it damp but not soaking wet. Let it sit for about 15 minutes so it’s completely dry but still slightly damp. This helps the oil soak in better.
Step Two: Decide on Oil Only or Oil Plus Beeswax
You’ve got two paths here. Both work great.
The Easy Way: Mineral Oil Only
Just use mineral oil by itself. It’s straightforward and does the job. Your board will look good and feel protected. This is perfect if you want the simplest approach. Many people do this and their boards turn out fantastic.
The Premium Way: Mineral Oil Plus Beeswax
Mix them together for a thicker paste. This combo gives you protection plus a nice finish. Beeswax makes the surface a bit harder and more water-resistant. Your board will feel fancier and look more polished.
To make the mix, warm your mineral oil gently. You don’t need it hot—just warm enough that it’s comfortable to touch. Put some beeswax in a jar, then pour the warm oil over it. Let it sit for a few minutes so the beeswax softens. Then stir it together until you get a smooth paste. It should look kind of like a thick salad dressing.
Step Three: Apply Your Oil or Oil Mix
Now comes the fun part. Pour a small amount of oil (or your oil and beeswax mix) directly onto the board. You don’t need a ton. Start with about a tablespoon or two for a medium-sized board.
Take your cloth and rub the oil all over the surface. Work it in circular motions. Really get it into the wood. Rub for a minute or two. Cover every inch—the flat surface, the edges, the underside. Don’t forget the underside! That matters too.
The wood will absorb the oil. Watch it disappear into the grain. That’s exactly what you want. This oil is going in and protecting the wood from the inside out.
Step Four: Wipe Away Extra Oil
After you’ve worked the oil in really well, wipe away any extra that sits on top. Use a clean part of your cloth. You want a thin coat that’s been absorbed. You don’t want puddles or dripping oil. The board should look slightly darker and have a subtle shine, not a greasy appearance.
Let it sit for 15 to 20 minutes. The remaining oil will soak deeper into the wood during this time.
Step Five: Polish It Up
After waiting, wipe it down again with a dry cloth. Remove any oil that’s still sitting on the surface. This gives you a nice, clean, polished look.
Step Six: Let It Rest
Now the important part—patience. Let your board sit undisturbed for at least 24 hours. Some people let it sit for 48 hours. The oil needs time to really soak in and cure. During this time, don’t use the board. Don’t wash it. Just let it be.
When to Do the Second Coat
Most boards need two coats. After that first 24-48 hour rest, repeat the whole oiling process again. Apply oil, work it in, wipe away the extra, and let it rest another 24 hours.
Two coats give your board the best protection. After the second coat, your board is fully prepped and ready to use.
What About Boards with Groove or Well Features?
If your board has a groove around the edges or a well in the center, pay extra attention to those spots. Oil doesn’t always flow into grooves on its own. Use your cloth to make sure you work oil right into those areas. You can also use a small brush to help get oil into tight spots. These grooves need protection just like the rest of the board.
Caring for Your Board After Prep
Your prep work was just the beginning. Now you’ve got to keep your board happy.
Oil It Regularly
After your initial two coats, oil your board once a month. This keeps it protected and looking great. A light oiling takes just five minutes. Just do what you did during prep—apply oil, work it in, wipe away the extra.
Wash It Right
Always hand-wash your cutting board. Never put it in the dishwasher. Use warm water and mild soap. Scrub gently. Dry it right away with a towel. Letting it sit wet can cause problems.
Let It Dry
After washing, stand it up so both sides can dry. Don’t lay it flat. Good air circulation helps it dry evenly.
Avoid Extreme Temperatures
Don’t put your board in the oven or near a heat source. Don’t leave it in direct sunlight for long periods. Heat and sun can warp the wood or cause it to crack.
Fix Small Damage
See a small scratch or dull spot? That’s normal. Just oil that area more often. You can do a quick spot treatment whenever you notice something.
Deep Conditioning
A few times a year, do a full oiling treatment like you did when you prepped the board. This deep condition keeps your board in top shape.
Common Mistakes to Avoid
Don’t use vegetable oil, coconut oil, or olive oil on your cutting board. These oils go rancid. Your board will smell bad and the oil will gum up. Stick with food-grade mineral oil.
Don’t soak your board in water. A quick wash is fine, but letting it sit in water causes swelling and warping. Wash, dry, move on.
Don’t use sandpaper or harsh scrubbing tools on your board. You’ll damage the surface. Gentle cleaning is the way.
Don’t skip the oiling step. Some people think their board is fine without it. It’s not. The oiling is what makes your board last years instead of months.
Don’t oil your board and then immediately use it. Let it dry. This gives the oil time to soak in properly and cure.
Don’t use harsh cleaners or bleach. Keep it simple with mild soap and water.
Different Types of Wood Boards
Not all wood cutting boards are the same. Different woods need slightly different care.
Hardwood Boards (Maple, Walnut, Cherry)
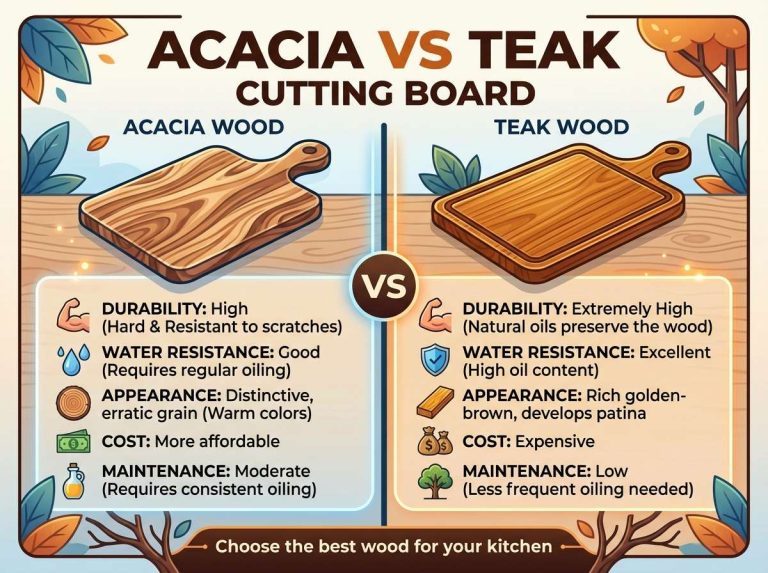
Hardwood boards are tough and beautiful. They take oil really well. They need regular oiling but aren’t fussy about it. Maple is super popular because it’s durable and looks great.
Softwood Boards (Pine, Cedar)
Softwoods are lighter and more affordable. They’re softer than hardwoods, so they dull knives a bit more. They need more frequent oiling because they absorb it faster. The good news is they’re more forgiving if you make small mistakes.
Bamboo Boards
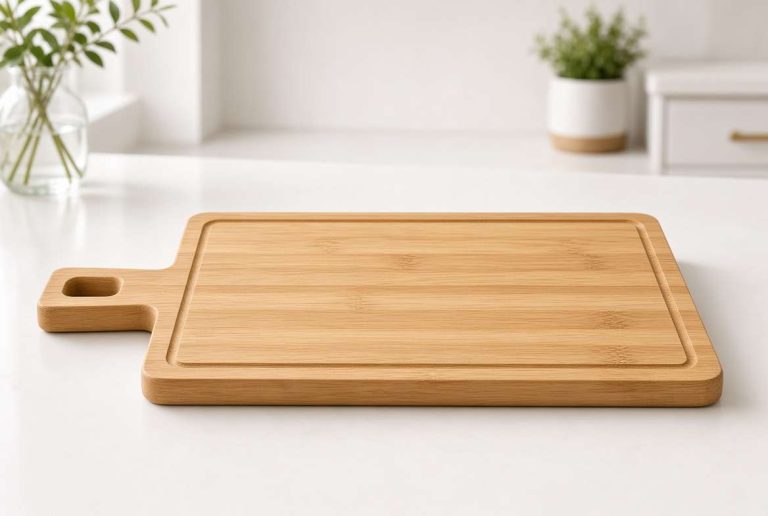
Bamboo is actually grass, not wood. It’s super hard and durable. It also doesn’t absorb oil the same way wood does. You still oil bamboo boards the same way, but don’t be surprised if it doesn’t soak in as quickly.
End-Grain Boards
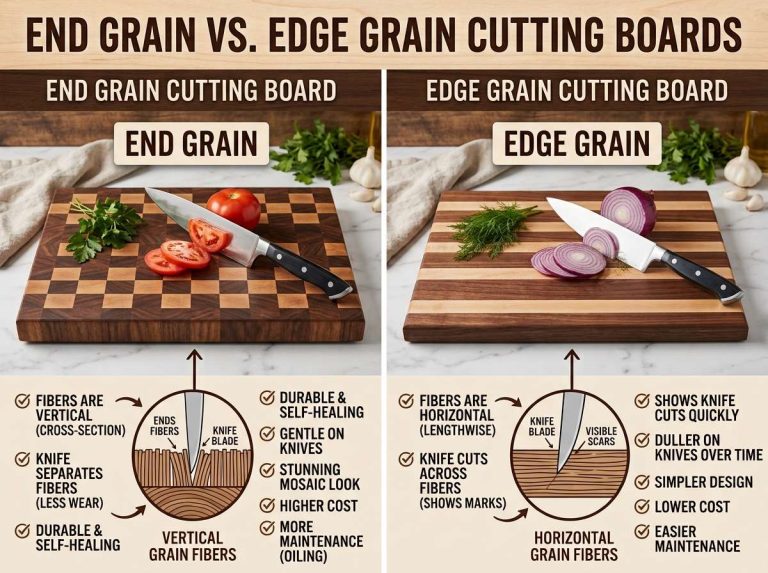
End-grain boards have the wood grain going up and down instead of across. These are the nicest boards because they’re gentler on your knives. They also need more frequent oiling because they absorb oil faster. The trade-off is worth it—your knives will stay sharp way longer.
How Long Does Prep Take?
Real talk—the actual hands-on work takes about 20 minutes. That’s washing, applying oil, and wiping away the extra. The rest is just waiting time. You can do something else while your board rests.
If you do two coats (which you should), you’re looking at about 40 minutes of actual work spread over a couple of days. That’s super reasonable for something you’ll use for years.
Signs Your Board Needs Extra Oil
As you use your board, watch for signs it needs attention. If it looks dull instead of having a subtle shine, it’s thirsty. If it feels rough to the touch, it needs oil. If water sits on top instead of soaking in, that’s a sign too.
Any of these situations mean it’s time for an oiling session. Don’t wait until your board looks terrible. Regular maintenance prevents problems.
Making Your Board Food-Safe
Here’s something that worries new board owners—is my board food-safe after oiling? The answer is yes, absolutely. Food-grade mineral oil is completely safe. It’s used on cutting boards, salad bowls, and wooden spoons. It doesn’t go rancid like plant oils do. Beeswax is also food-safe. Just make sure whatever products you use say “food-grade.”
After your board is oiled and dry, it’s ready for your food. You don’t need to worry.
Storing Your Board
Where you store your board matters. Stand it up vertically if you can. This prevents warping. If you have to lay it flat, make sure it’s somewhere cool and dry. Don’t store it near a window where the sun hits it all day. Don’t store it next to heat sources like ovens or radiators.
A kitchen cabinet or a spot on a counter works great. Just keep it away from extreme conditions.
Special Situation: Inherited or Very Old Boards
Sometimes you get a wooden board that’s been sitting around for a while. It might look dry, dark, or even slightly damaged. Don’t worry. The oiling process can bring it back to life.
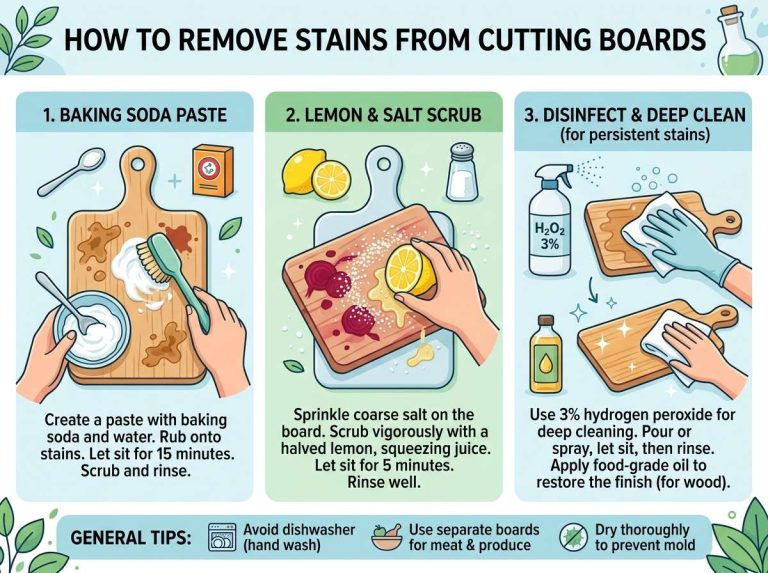
Give it a thorough wash. If it’s really dirty, you can use a bit of white vinegar in the water. Let it dry completely. Then oil it the same way you would a new board. You might need three coats instead of two to really revive it. Be patient, and it’ll bounce back.
Troubleshooting Common Issues
My board has cracks or splinters
Small splinters happen. Use fine sandpaper to smooth them out gently. Then oil it again. For small cracks, just keep oiling. They often close back up as the wood gets moisturized.
There are white spots on my board
White spots usually mean water damage. These happen from washing or water sitting on the board. Let the board dry completely. Then oil it really well. The spots often fade as the oil soaks in.
My board still looks dry even after oiling
Some woods are thirstier than others. Do an extra coat or two. Also, make sure you’re using food-grade mineral oil. Other products won’t work the same way.
The wood grain looks raised
This sometimes happens with new boards. Give it a gentle sanding with very fine sandpaper (220 grit or higher). Then oil it again. This smooths everything out.
Tips from People Who Love Their Boards
Talk to people who’ve had wooden boards for years. Here’s what they’ll tell you. Oil it regularly. Wash it by hand. Dry it right away. Don’t let it get too dry or too wet. Use a separate board for raw meat if you can. Most importantly, use your board. It’s meant for the kitchen, not sitting pretty on a shelf.
The Long Game: Why This Matters
Your prep work is an investment. You’re doing 20 minutes of work today so your board lasts 10 or 15 years instead of falling apart in a year. A well-maintained wood cutting board becomes part of your kitchen. It develops character. The patina—those marks and slight discoloration from years of use—is a good thing. It shows your board has a history.
This is different from plastic boards that you throw away when they get worn. Wood boards get better with age if you treat them right.
Final Checklist Before You Start Cutting
Before you use your board for the first time, run through this quick checklist. Have you washed it? Check. Have you oiled it twice? Check. Has it rested for 24 hours after the second coat? Check. Does it look and feel good? Check. Is it completely dry? Check. Great. Now you’re ready.
Wrapping It Up
Prepping a new wood cutting board is straightforward. Wash it. Oil it. Wait. Oil it again. Wait some more. Then use it and love it.
The process is simple, but it matters. Those small steps at the beginning set your board up for a long, healthy life. You’ll cut vegetables on this board, slice bread, chop herbs, and make countless meals. That prep work makes all of that possible.
So grab that mineral oil. Find a cloth. Get to work. Your board will thank you, and you’ll have a kitchen tool that lasts for years. That’s worth the 20 minutes you’ll spend prepping it.
Now go make your new board part of your kitchen. It’s ready to start its journey.

Mary is a home cooking enthusiast and kitchen gear reviewer with a passion for practical cookware and food preparation tools. She enjoys testing cutting boards, knives, kitchen gadgets, and other cooking essentials to help home chefs make smarter buying decisions. Through KitchenCutting.com, Mary shares honest product reviews, buying guides, and helpful kitchen tips to make cooking easier, safer, and more enjoyable.