How to Use a Kitchen Scale?
If you love cooking or baking, you have probably heard people say that a kitchen scale is a game changer. And they are right. A kitchen scale is one of the easiest tools to use once you know the basics, and it can make your food taste better every single time. In this guide, we will walk through everything you need to know about using a kitchen scale, from setup to daily use, so you can start weighing your ingredients like a pro.
In this article
Why a Kitchen Scale Matters So Much
Before we jump into the steps, let’s talk about why this small tool makes such a big difference. Measuring cups and spoons seem handy, but they are not always accurate. A cup of flour can weigh differently depending on how you scoop it. Sometimes it’s packed tight, sometimes it’s loose and fluffy. This small difference can throw off a whole recipe, especially in baking where precision really counts.
A kitchen scale removes this guesswork. It gives you exact weight, in grams or ounces, so your measurements stay the same every time. This is especially important for bread, cakes, cookies, and anything that needs a balanced ratio of ingredients like flour, sugar, butter, and liquid. Once you start using a scale, you will notice your baked goods turn out more consistent, fluffier, and better textured overall.
It also helps with portion control if you are watching your calorie intake or following a meal plan. Instead of guessing how much chicken or rice is on your plate, a scale tells you the exact amount, which makes tracking nutrition much easier.
Types of Kitchen Scales
There are a few common types of kitchen scales you might come across:
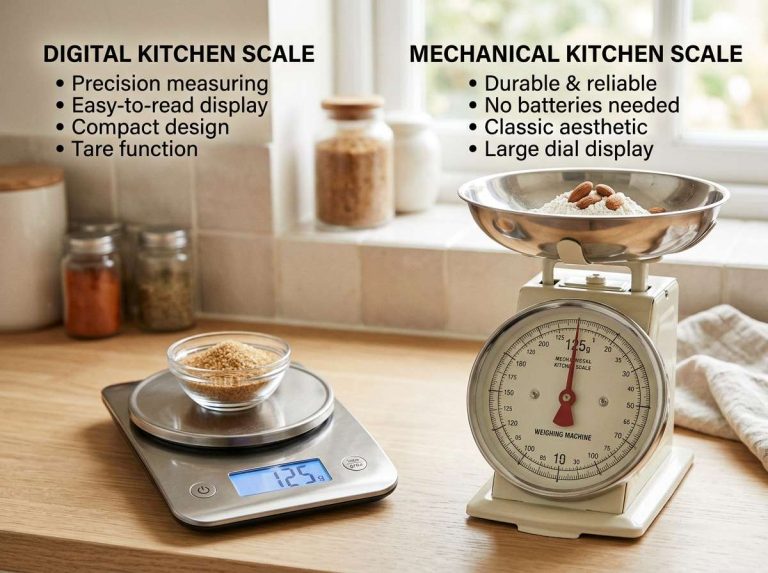
- Digital kitchen scales – These are the most popular choice today. They show weight on a small screen and usually let you switch between grams, ounces, and pounds.
- Mechanical kitchen scales – These use a spring and dial instead of a digital screen. They are simple but less precise than digital ones.
- Smart kitchen scales – These connect to an app on your phone and can even calculate nutrition info for you as you weigh food.
For most home cooks, a basic digital scale works perfectly fine and doesn’t cost much money.
Getting Familiar With Your Kitchen Scale
Every scale looks a little different, but most digital scales share the same basic parts:
- The base – the flat surface where you place your bowl or ingredients
- The display screen – shows the current weight
- Buttons – usually for power, unit conversion, and the tare function (more on that soon)
- Battery compartment – found on the bottom or side of the scale
Before using it for the first time, check if it needs batteries installed. Most scales come with them already inside, but it’s good to check just in case.
Step-by-Step: How to Use a Kitchen Scale
Now let’s get into the actual steps. This part is simple, and once you do it a few times, it will feel completely natural.
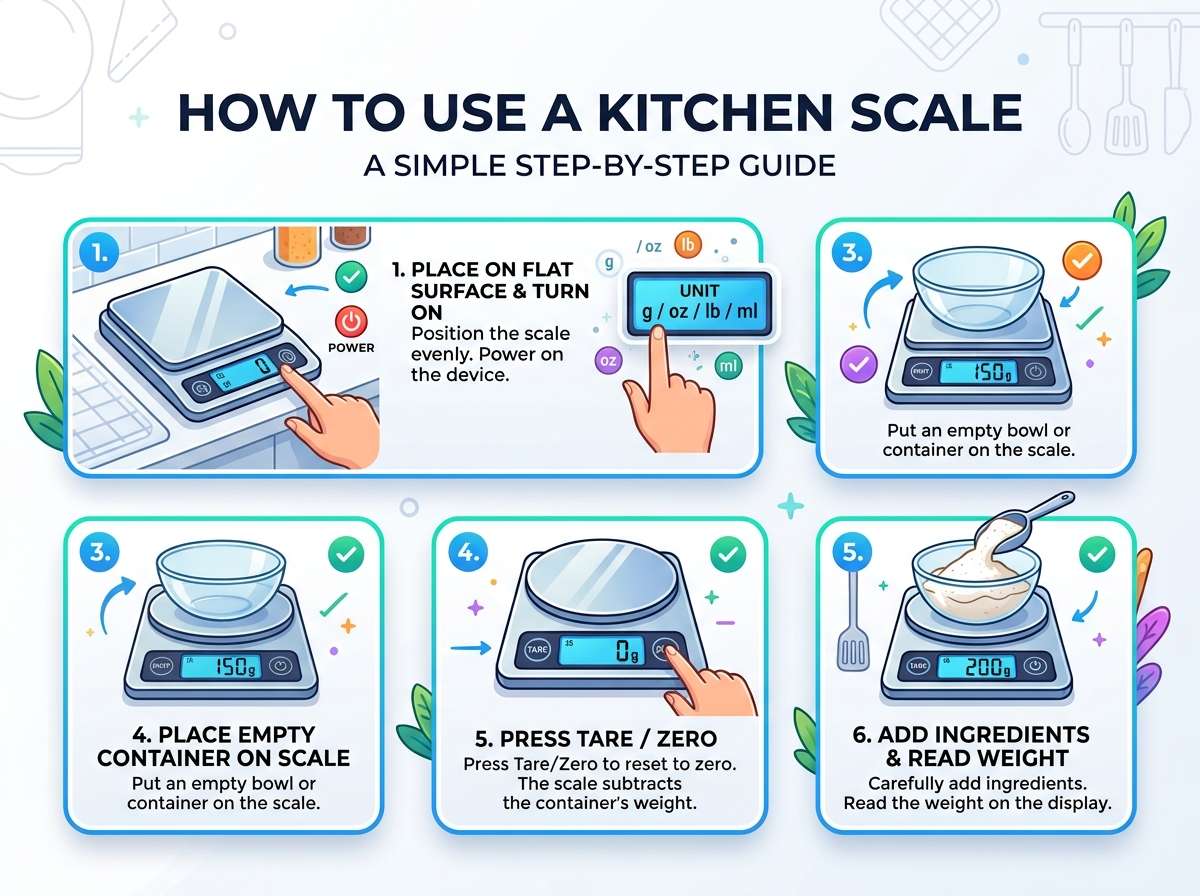
Step 1: Place the Scale on a Flat, Stable Surface
Set your scale on a flat countertop. Avoid uneven surfaces or anything wobbly, because this can throw off the reading. A steady base gives you an accurate weight every time.
Step 2: Turn On the Scale
Press the power button and wait for the display to show zero. Some scales turn on automatically as soon as you place something on them, but most need a manual power button press.
Step 3: Add Your Container (Bowl, Plate, or Cup)
If you’re weighing an ingredient inside a bowl or on a plate, place the empty container on the scale first. The screen will now show the weight of the container itself, not the food yet.
Step 4: Use the Tare Function to Reset to Zero
This step is the real secret to using a kitchen scale properly. The tare button lets you reset the display back to zero, even with the container already sitting on the scale. This way, you only see the weight of what you add afterward, not the container’s weight.
Simply press the “tare” or “zero” button after placing your container down. The screen should now read 0.0.
Step 5: Add Your Ingredient
Now you can start adding your ingredient directly into the container. Watch the numbers rise as you pour in flour, sugar, liquid, or anything else. Stop once you reach the amount your recipe calls for.
Step 6: Repeat Tare Between Ingredients
Here’s a small trick that saves a lot of dish washing: instead of using a separate bowl for every ingredient, you can weigh everything in the same bowl one at a time.
For example, if your recipe needs 200 grams of flour and 100 grams of sugar, add the flour first, watch it reach 200 grams, then press tare again to reset back to zero. Now add the sugar until it reaches 100 grams. This way, the display always tells you exactly how much of the current ingredient you added, without any mixing math in your head.
Step 7: Switch Units If Needed
Most digital scales let you switch between grams and ounces with a single button, usually labeled “unit” or “mode.” If a recipe uses grams and you’re more familiar with ounces, or the other way around, just tap that button until the right unit shows up on screen.
Step 8: Clean the Scale After Use
Wipe down the surface with a damp cloth after each use, especially if any flour, oil, or liquid spilled on it. Avoid submerging digital scales in water since this can damage the electronics inside. Just a gentle wipe is enough to keep it clean and working well.
Tips for Getting the Most Accurate Readings
A kitchen scale is only as good as how you use it. Here are some helpful tips to keep your measurements spot on:
Always tare before adding a new ingredient. Skipping this step is the most common mistake beginners make. Without taring, you end up weighing the container along with your ingredient, which throws off the whole recipe.
Keep the scale on a flat surface, not a towel or uneven mat. Even a slight tilt can cause an inaccurate reading.
Check the battery level regularly. A low battery can sometimes cause the display to flicker or show wrong numbers.
Avoid pressing down on the scale. Let the ingredient sit naturally in the container instead of pushing it down, since pressure can affect the reading.
Use the right container size. A container that’s too small might spill over as you pour ingredients, so pick something with enough room.
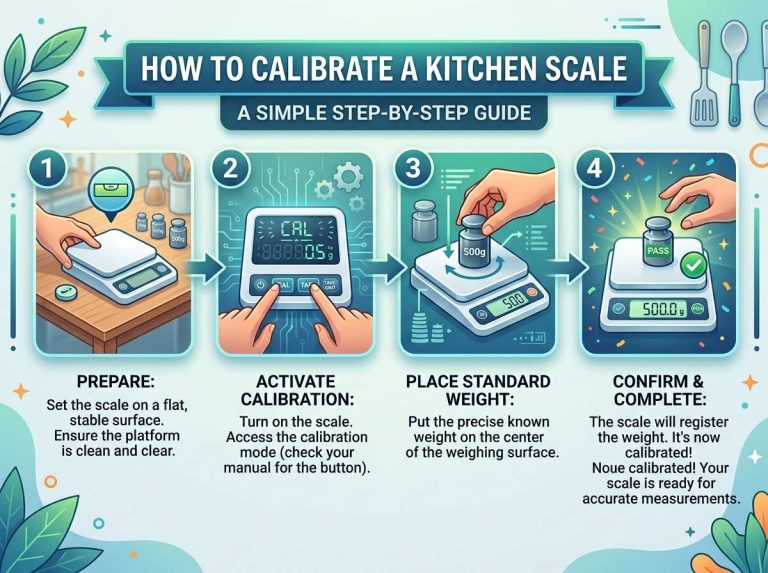
Recalibrate occasionally. Some scales have a calibration setting, especially mechanical ones. If your scale seems off, check the manual for calibration instructions.
Common Mistakes People Make With Kitchen Scales
Even with something this simple, a few mistakes pop up often:
- Forgetting to tare between ingredients – This leads to inaccurate weight for each new item added.
- Not zeroing out the container weight at all – Some beginners weigh the food together with the bowl without resetting first, which messes up the final amount.
- Placing the scale on an uneven counter – Small tilts can shift the number shown.
- Ignoring unit settings – Mixing up grams and ounces can completely change a recipe’s outcome.
- Overloading the scale beyond its weight limit – Every scale has a maximum capacity, usually printed somewhere on the device or in the manual. Going over this limit can damage it or give a wrong reading.
Being aware of these small errors helps you get accurate weight every single time you cook or bake.
How a Kitchen Scale Helps With Baking Specifically
Baking is really where a kitchen scale shines the most. Unlike cooking, where you can adjust seasoning as you go, baking is closer to chemistry. The ratio between flour, sugar, fat, and liquid needs to stay balanced, or your cake, bread, or cookies might not rise properly or hold their shape.
Bakers often talk about something called “baker’s percentage,” which is based entirely on weight rather than volume. This method uses flour weight as the base, and every other ingredient is a percentage of that. It sounds technical, but once you get a scale, following recipes that use this system becomes so much easier.
Bread recipes especially depend on precise water-to-flour ratios (called hydration levels). A small difference in flour weight, even just 20 or 30 grams, can change the texture of your dough from soft and workable to dry and crumbly.
How a Kitchen Scale Helps With Portion Control and Diet Tracking
If you’re trying to eat healthier or track your daily food intake, a kitchen scale becomes just as useful in the kitchen as a measuring tool for calories and macros. Instead of estimating how much protein, carbs, or fat you’re eating, you get an exact number.
For example, weighing your chicken breast, rice, or vegetables lets you log accurate numbers into any nutrition app. Over time, this habit builds a much clearer picture of your daily eating pattern, without any guesswork involved.
Kitchen Scale vs Measuring Cups: Which One Should You Use?
Measuring cups are not useless, they just work better for liquids like water, milk, or oil, where volume measurement is naturally consistent. But for dry ingredients like flour, sugar, oats, or shredded cheese, a scale gives far more reliable results.
Here’s a quick comparison:
- Liquids: Measuring cups work fine since liquid volume doesn’t change much.
- Dry or powdery ingredients: A scale is much more reliable since packing and scooping can vary the weight.
- Precision baking: A scale wins every time, especially for bread, pastry, and delicate desserts.
- Quick everyday cooking: Cups can work fine if precision isn’t critical, like tossing vegetables into a soup.
Many home cooks eventually use both tools together, cups for liquids and a scale for everything else.
How to Store and Maintain Your Kitchen Scale
Taking care of your scale properly helps it last longer and stay accurate. Here are a few habits worth building:
- Store it in a dry place, away from moisture or heat near the stove.
- Remove batteries if you won’t use it for a long stretch of time, to avoid corrosion.
- Avoid dropping it, since internal sensors can get damaged easily.
- Keep the surface clean and dry after each use.
- Check the manufacturer’s manual for any specific cleaning instructions, since some models have different care needs.
Frequently Asked Questions About Kitchen Scales
Do I need an expensive scale to get accurate results? Not really. A basic digital scale under a modest price range can give perfectly accurate readings for home cooking and baking. Expensive models often add extra features like smart app connections or fancy designs, but the core function stays the same.
Can I weigh liquids on a kitchen scale? Yes, absolutely. Since water has a simple weight-to-volume relationship (1 milliliter of water equals about 1 gram), many scales let you switch to a milliliter setting for liquids too.
What if my scale shows a negative number? This usually happens if you remove something from the scale after taring. Simply reset it back to zero by pressing tare again with nothing on the surface, or removing and reapplying the container.
How accurate should a good kitchen scale be? Look for a scale with at least 1-gram accuracy for most baking needs. Some specialty scales for coffee or spices go down to 0.1 grams for extra precision.
Can a kitchen scale replace measuring spoons too? For small amounts like baking soda or spices, a scale can work, but tiny amounts like a teaspoon of salt might be hard to read on a regular scale unless it has a high-precision mode.
Final Thoughts
Learning how to use a kitchen scale is one of the simplest upgrades you can make in your kitchen routine. It takes just a few minutes to learn, and the payoff shows up in every recipe you make afterward, more consistent bakes, better portion control, and less waste from measurement mistakes. Once you get comfortable with the tare function and basic weighing steps, you will likely never go back to guessing with cups alone.
Start small, weigh a few ingredients the next time you cook, and notice how much smoother the whole process feels. Over time, this simple habit turns into second nature, and your food quality naturally goes up along with it.

Mary is a home cooking enthusiast and kitchen gear reviewer with a passion for practical cookware and food preparation tools. She enjoys testing cutting boards, knives, kitchen gadgets, and other cooking essentials to help home chefs make smarter buying decisions. Through KitchenCutting.com, Mary shares honest product reviews, buying guides, and helpful kitchen tips to make cooking easier, safer, and more enjoyable.