How to Clean a Vegetable Chopper?
A vegetable chopper is one of the best tools you can keep in your kitchen. It saves time, cuts down on prep work, and turns a boring task like dicing onions into a quick job. But here’s the thing many people forget: a chopper only stays useful if you clean it the right way. Food bits, juice, and oil can get stuck in the blades, the lid, and the base if you skip proper cleaning. Over time this leads to bad smells, rust, and even mold.
In this article
The good news is that cleaning a vegetable chopper is not hard at all. In this guide, we’ll walk through simple steps that anyone can follow, even if you’ve never deep-cleaned a kitchen tool before. We’ll also cover tips to keep your chopper sharp, safe, and fresh for a long time.
Let’s get into it.
Why Cleaning Your Vegetable Chopper Matters
Before we jump into the steps, it helps to know why this task is worth your time.
A dirty chopper can hold onto bacteria. Vegetable juice, onion bits, and tiny food particles get trapped in tight corners, especially near the blades and the hinge of the lid. If left there, this buildup can turn smelly and even grow mold. That’s not something you want near your food.
There’s also the issue of dull blades. When old food dries onto the cutting edges, the blades don’t cut as cleanly. This means more effort on your part and uneven chopping the next time you use it.
Lastly, a clean chopper simply lasts longer. Rust and grime wear down plastic parts and metal blades faster than regular, gentle cleaning would.
So, cleaning your chopper isn’t just about looks. It’s about food safety, smooth performance, and getting more years out of your kitchen gadget.
What You’ll Need Before You Start
You don’t need any fancy supplies for this job. Most of what you need is already sitting in your kitchen.
Here’s a simple list:
- Warm water
- Mild dish soap
- A soft sponge or brush (an old toothbrush works great for tight spots)
- A dry towel or dish cloth
- A toothpick or small brush for corners
- White vinegar (optional, for extra freshness)
- Baking soda (optional, for stains or odor)
Once you have these ready, you’re all set to begin.
Step-by-Step Guide to Cleaning a Vegetable Chopper
Step 1: Unplug or Disassemble First
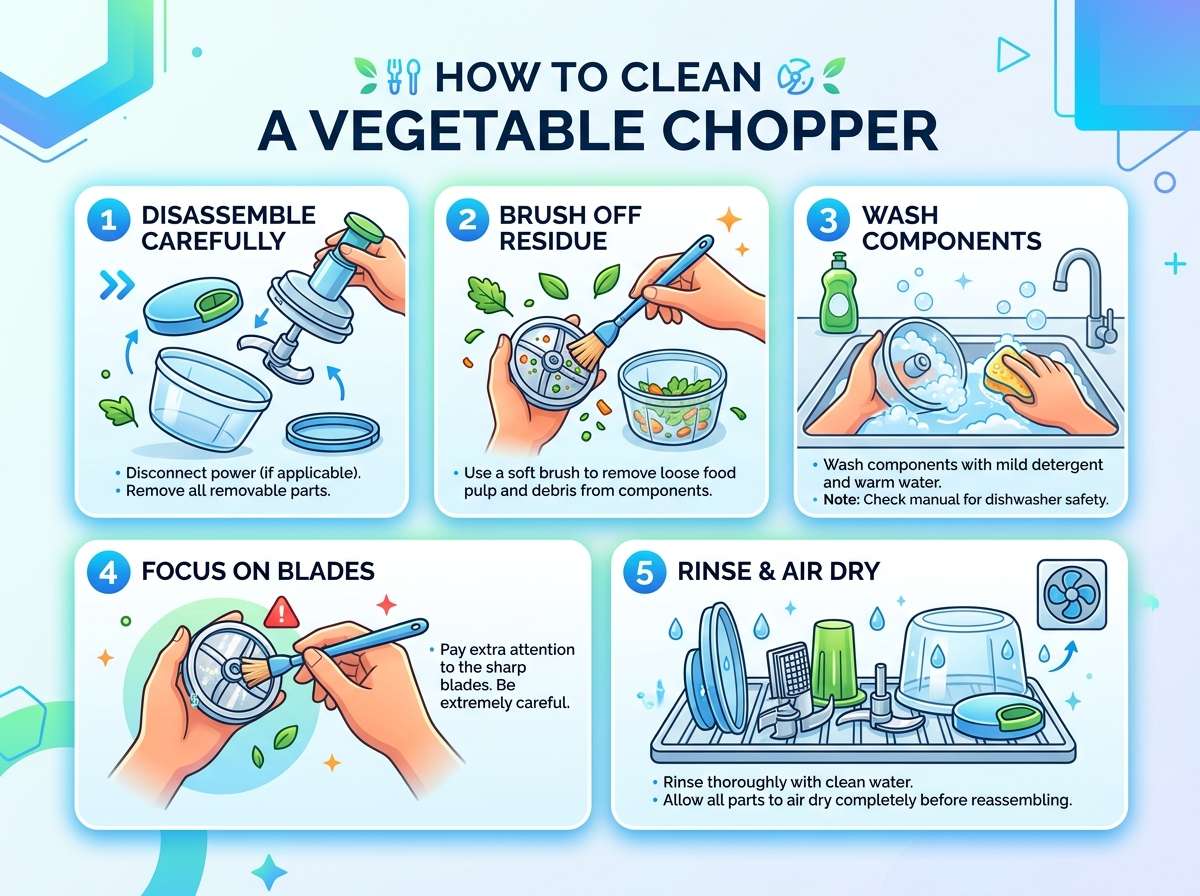
If your chopper is electric, always unplug it before touching the blades. Safety comes first. Never try to clean any chopper while it’s plugged in or turned on, even if it looks harmless.
For manual choppers, this step is simple. Just make sure the chopper is not under pressure or locked in a way that could snap shut on your fingers.
Take apart every piece you can. Most vegetable choppers come with:
- A lid or pusher
- A blade unit
- A container or bowl
- A base (for electric models)
Taking each part off separately makes it much easier to clean every nook without missing spots.
Step 2: Rinse Off the Big Chunks
Right after you finish chopping, give all the parts a quick rinse under running water. This step removes loose bits of food before they dry and stick.
Doing this early saves you a lot of scrubbing later. If you leave a chopper sitting for hours with wet food inside, the residue hardens and becomes tricky to remove.
Use lukewarm water for this rinse. Very hot water isn’t necessary at this stage, and it can sometimes cause plastic parts to warp if the material is not high heat resistant.
Step 3: Wash With Soap and Water
Now it’s time for the real clean. Fill your sink or a large bowl with warm water and add a few drops of mild dish soap.
Dip a soft sponge into the soapy water and gently scrub each piece:
- The blade unit (careful here, blades are sharp)
- The bowl or container
- The lid and pusher
- Any rubber seals or gaskets
Pay close attention to the blade area since that’s where most gunk builds up. Fibrous vegetables like carrots or celery often leave thin strands stuck between blades.
If your chopper has small crevices, a toothbrush works wonders. Gently brush along the edges to loosen trapped bits.
Avoid using rough scrubbers like steel wool, since they can scratch the surface of the container and dull the blades faster.
Step 4: Rinse Thoroughly
After washing, rinse every part under clean, running water. Make sure there’s no soap residue left behind, especially inside the bowl or around the blade unit. Leftover soap can affect the taste of your next batch of chopped veggies, which nobody wants.
Turn the pieces over and check for any leftover bubbles or slippery feel. If you still feel soap on the surface, rinse again until it feels completely clean.
Step 5: Dry Every Part Completely
This step is often skipped, but it’s just as important as washing.
Use a dry towel to wipe down each piece. Pay extra attention to the blade area, since metal parts can rust if left wet for too long. Corners and joints also tend to trap moisture, so give them a careful wipe too.
If you have time, let the parts air dry on a drying rack for a bit before putting the chopper back together. This extra drying time helps prevent any hidden dampness from turning into mold later.
Step 6: Reassemble and Store Properly
Once every part is fully dry, put the chopper back together. Store it somewhere clean and dry, like a kitchen drawer or cabinet.
Try not to stack heavy items on top of your chopper, since pressure over time can bend the blade unit or crack the lid.
If your chopper came with a storage case or box, use it. This keeps dust away and protects the blades from getting knocked around by other kitchen tools.
How to Clean the Blades Safely
Blades deserve their own section because they need extra care.
Vegetable chopper blades are usually thin, sharp, and sometimes stacked closely together. This makes them a bit tricky to clean by hand.
Here are a few tips to stay safe and get them spotless:
- Hold the blade unit by the edges, away from the sharp parts.
- Use a small brush, like a toothbrush, to clean between blade layers.
- Never run your finger directly across the blade to check for leftover food. Use a brush or a toothpick instead.
- Rinse the blade unit under running water rather than soaking it, since soaking can sometimes loosen certain adhesives used in cheaper models.
- Dry blades immediately after washing to stop rust from forming.
If your chopper’s blade unit is dishwasher safe, place it on the top rack, away from other sharp utensils, so nothing bumps into it during the wash cycle.
Cleaning a Manual Vegetable Chopper vs an Electric One
Not every chopper is built the same way, so cleaning steps can shift slightly depending on the type you own.
Manual Chopper Cleaning
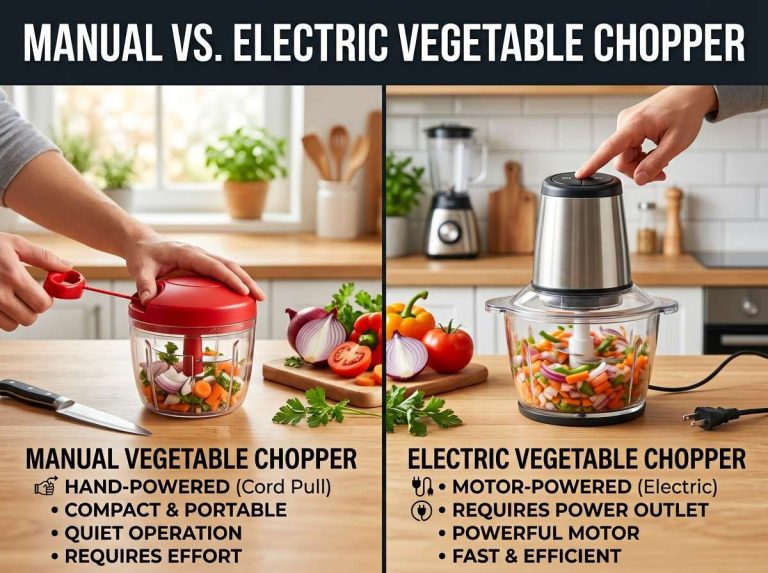
Manual choppers are usually simple in design, made of a pull-string or press-down mechanism connected to a blade unit. Since there’s no motor or wiring involved, you can rinse most parts directly under water without worry.
Just remember to check the pull-string mechanism (if your model has one) for trapped bits of vegetable, since string parts can collect grime over time.
Electric Chopper Cleaning
Electric choppers come with a motor base that should never touch water. Only the removable bowl, blade, and lid should be washed.
Wipe the motor base with a damp cloth instead of dunking it in water. A few drops of mild soap on the cloth can help remove grease or splashes without risking damage to the electrical parts.
Always double check your product’s manual, since some electric models allow certain parts to go into the dishwasher while others don’t.
Removing Tough Stains and Odors
Sometimes veggies like beets, turmeric, or garlic leave behind strong smells or stubborn stains. Here’s how to deal with them.
For Stains
Mix a small amount of baking soda with water to form a paste. Apply this paste to the stained area and let it sit for about ten minutes. Then scrub gently with a sponge and rinse well.
For Odors
Fill the chopper’s bowl with a mix of warm water and a splash of white vinegar. Let it sit for a few minutes, then rinse thoroughly. Vinegar naturally breaks down smells without leaving behind a strong scent of its own once it dries.
Sun drying also helps remove lingering odors from plastic parts, since fresh air and light naturally reduce smell buildup.
How Often Should You Clean Your Vegetable Chopper?
Ideally, clean your chopper right after every use. Leaving food particles inside, even overnight, gives bacteria more time to grow and makes the next cleanup harder.
If you use your chopper daily, a deep clean once a week is a smart habit. This means taking apart every single piece, including seals and gaskets, and giving them a thorough scrub, rinse, and full dry.
For choppers used only occasionally, a quick wash after each use is usually enough, along with a deeper check every couple of weeks if it’s been sitting unused for a while.
Common Mistakes to Avoid
A few small habits can shorten the life of your chopper or make it harder to keep clean. Watch out for these:
- Leaving food inside too long: Dried, crusty bits are much harder to remove than fresh ones.
- Using abrasive scrubbers: These scratch surfaces and dull blades.
- Skipping the drying step: Wet parts stored away can lead to rust or mildew.
- Ignoring the manual: Some parts aren’t dishwasher safe, even if others are.
- Touching blades with bare hands: Always use a brush or cloth to clean sharp edges.
- Storing while damp: This traps moisture and encourages bacteria growth.
Avoiding these simple mistakes keeps your chopper working well for a long time.
Tips to Keep Your Vegetable Chopper Fresh Longer
Here are a few extra habits that go a long way:
- Rinse right after use, even if you plan to do a full wash later.
- Keep a small brush near your sink just for kitchen tools like this.
- Store the chopper with the lid slightly open if possible, to let any trapped moisture escape.
- Avoid chopping extremely hot food right away, since sudden temperature shifts can warp certain plastic parts.
- Replace worn-out rubber seals or gaskets if they start smelling bad no matter how much you clean them, since old rubber can hold onto odors permanently.
Final Thoughts
Cleaning a vegetable chopper doesn’t need to feel like a chore. With just a few minutes after each use, plus a deeper clean every week or so, your chopper stays fresh, safe, and ready for action anytime you need it.
Remember to take it apart, rinse early, wash gently, dry fully, and store it in a clean spot. Handle the blades with care, and don’t skip the small crevices where food tends to hide.
A little routine care goes a long way. Not only will your chopped vegetables taste better without any lingering smells, but your chopper will also last much longer, saving you money and kitchen hassle down the road.
So next time you finish chopping onions, garlic, or peppers, take those extra few minutes to clean up right away. Your future self, and your next meal, will thank you for it.

Mary is a home cooking enthusiast and kitchen gear reviewer with a passion for practical cookware and food preparation tools. She enjoys testing cutting boards, knives, kitchen gadgets, and other cooking essentials to help home chefs make smarter buying decisions. Through KitchenCutting.com, Mary shares honest product reviews, buying guides, and helpful kitchen tips to make cooking easier, safer, and more enjoyable.