How to Store Kitchen Peelers?
A kitchen peeler looks small, but it plays a big role in almost every meal you cook. You grab it to skin potatoes, carrots, apples, and even cheese blocks. Yet most people just toss it into a drawer with spoons, forks, and other random tools. Over time, this habit dulls the blade, causes rust, and can even lead to small cuts when you reach in without looking. Good storage fixes all of that.
In this article
This guide walks you through easy, practical ways to store kitchen peelers so they stay sharp, safe, and easy to find. You don’t need fancy gadgets or a big budget. You just need a plan that fits your kitchen and your habits.
Why Peeler Storage Actually Matters
Many people think a peeler is too simple to need special care. It’s just a blade with a handle, right? But that blade is thin and exposed, unlike a knife that often has a sheath or a block to slide into. When you drop a peeler into a messy drawer, the edge rubs against other metal tools every time the drawer opens and closes. This friction wears down the blade faster than normal use ever would.
There’s also the safety side. A peeler blade may be small, but it’s sharp enough to nick your finger if you reach into a cluttered drawer without looking. Kids and guests who don’t know where things are kept face the same risk. Good storage keeps the blade covered or angled away from where hands naturally go.
Then there’s rust. Peelers with carbon steel blades are more prone to rust than stainless ones. If you store a wet peeler in a closed drawer, moisture gets trapped and speeds up corrosion. A little airflow and a dry spot go a long way in keeping the blade in good shape for years.
Lastly, think about time. How many times have you dug through a drawer looking for a peeler while your hands are covered in flour or vegetable juice? Clear, organized storage saves you those small but annoying moments every single day.
Types of Kitchen Peelers and How Storage Needs Differ
Before you pick a storage method, it helps to know what kind of peeler you own, since each type has slightly different needs.
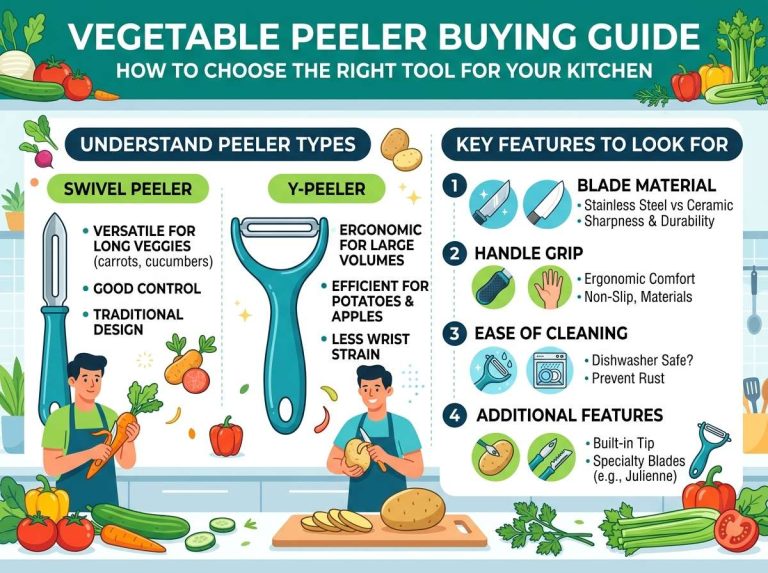
Y-peelers have a handle shaped like the letter Y, with the blade sitting across the top. They take up more width than length, so they need a spot where they can lie flat without the blade getting squeezed against other tools.
Straight peelers (also called swivel peelers) look more like a small knife with a slot near the top. These are easy to hang because most come with a small hole in the handle.
Julienne peelers have tiny teeth that cut thin strips of vegetables. These teeth catch on fabric, paper towels, and other tools easily, so they need a spot where nothing rubs against the blade.
Electric peelers are bulkier and often come with a charging dock or a cord. These need a dedicated spot near an outlet rather than a drawer.
Once you know your peeler type, you can match it to a storage method that actually works instead of just shoving it wherever there’s space.
Best Places to Store Kitchen Peelers
1. A Dedicated Utensil Drawer with Dividers
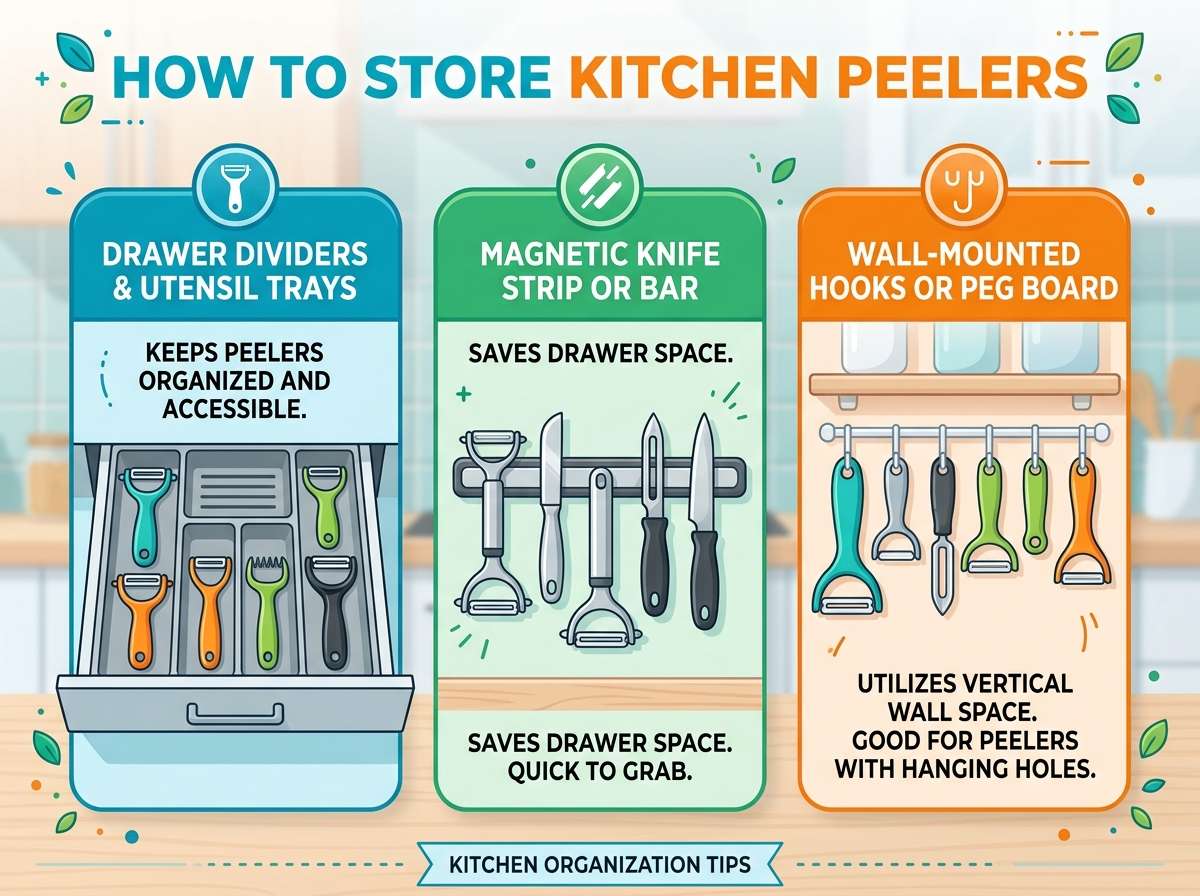
This is one of the easiest upgrades you can make. Instead of tossing every tool into one big drawer, add a divider tray. These trays come in plastic, bamboo, or metal, and most fit standard kitchen drawers with little to no cutting or adjusting.
Give the peeler its own slot, away from spoons, tongs, and other bulky items. This keeps the blade from getting nicked and stops it from nicking you when you reach in. If your drawer already has a tray but no peeler slot, you can add a small strip of foam or a rubber grip to keep it in place.
2. A Knife Block or Blade Holder
Some knife blocks come with slots wide enough for a peeler, especially the straight or Y-style ones. If your block has an empty slot, this is a smart place to store your peeler since it keeps the blade pointed down and away from fingers.
If you don’t want to mix your peeler with your knives, a small standalone blade holder works just as well. These holders are often magnetic or made from wood with narrow slots cut in.
3. A Magnetic Strip on the Wall
A magnetic knife strip isn’t just for knives. Many peelers, especially straight and Y-peelers with metal blades, stick to these strips just fine. Mount the strip on a clean, dry wall near your prep area, and place the peeler blade-side against the metal.
This method keeps the peeler visible, dry, and out of reach of small hands, since it sits above counter height. It also frees up drawer space for other tools. Just make sure the strip is mounted securely, since a loose strip can cause tools to fall.
4. A Hanging Rail or Rack
A rail system, often used for pots and utensils, works great for peelers with a hole in the handle. Slide a small S-hook through the hole and hang it directly on the rail. This keeps the peeler in open air, which helps it dry fully after washing and stops moisture from building up.
Rails also make peelers easy to spot at a glance, so you’re not digging through drawers mid-recipe.
5. A Small Container or Crock Near the Stove
If you like open storage, a small crock or cup can hold a peeler along with a few other frequently used tools like a spatula or tongs. Place it near your prep counter rather than right next to the stove, since heat can warp plastic handles over time.
Keep the blade pointed down in the crock so the sharp edge doesn’t stick out at hand level. This method is fast and casual, great for people who cook often and want tools within arm’s reach.
6. A Sheath or Blade Cover
Some peelers come with a plastic or silicone cover that slides over the blade. If yours came with one, use it every time you put the peeler away, even in a drawer. A sheath adds a layer of protection against both dulling and accidental cuts.
If your peeler didn’t come with a cover, small universal blade guards are cheap and easy to find. These are especially useful for julienne peelers, since the tiny teeth benefit from full coverage.
7. A Pegboard System
A pegboard mounted on the wall gives you full control over your kitchen layout. Add small hooks exactly where you want them, and hang your peeler along with other prep tools. This setup works well in kitchens with limited drawer space, and it adds a nice visual element too, since everything stays visible and organized.
Tips for Keeping Your Peeler in Top Shape
Storage location matters, but a few extra habits make a real difference in how long your peeler lasts.
Dry it fully before storing. Water left on the blade speeds up rust, especially on carbon steel. A quick wipe with a towel after washing takes just a few seconds and protects the metal for the long run.
Avoid the dishwasher if the handle is wood or has glued parts. Heat and moisture from a dishwasher cycle can loosen glue and crack wood over time. Hand washing keeps the whole tool intact longer.
Keep it away from other sharp tools rubbing directly against it. Even in a drawer, a small foam strip or divider prevents blade-on-blade contact that dulls the edge faster.
Store it blade-down or blade-covered. This simple habit reduces the risk of cuts every time you or someone else reaches into a drawer or crock.
Check for rust spots occasionally. If you spot a little rust, a light scrub with baking soda and a damp cloth often removes it before it spreads.
Replace worn peelers instead of forcing a dull one to work. A dull peeler slips more easily, which actually raises your risk of injury compared to a sharp one. If sharpening isn’t an option for your peeler type, it may be time for a new one.
Storage Ideas Based on Kitchen Size
Small Kitchens or Rentals
If drawer space is tight or you can’t drill into walls, go for a magnetic strip with adhesive backing, a small over-the-door rack, or a compact crock. These options add almost no permanent changes and still keep your peeler easy to reach.
Medium-Sized Kitchens
A drawer divider tray paired with a wall-mounted rail gives you flexibility. You can store the peeler in the drawer for daily use and switch to the rail when you want more counter space during heavy cooking sessions.
Large Kitchens
With more room to work with, a pegboard system or a full knife block setup gives you both function and style. You can group your peeler with other prep tools like graters and zesters for a smooth workflow when cooking large meals.
Common Mistakes to Avoid
Tossing it loose into a junk drawer. This is the number one habit that leads to dull blades, rust, and small cuts. A junk drawer mixes too many random items, and a peeler blade doesn’t stand a chance against scissors, batteries, and rubber bands.
Leaving it wet in a closed space. Trapped moisture is one of the fastest ways to ruin a metal blade. Always let it air dry or towel dry before putting it away.
Storing it near heat sources. Plastic handles can warp, and glue on wooden handles can weaken when placed too close to a stove or oven.
Forgetting to clean the tray or drawer itself. Food bits and dust build up over time in trays and crocks. A quick wipe every so often keeps the storage spot as clean as the tool itself.
Mixing sharp tools without any separation. Even a small foam divider makes a big difference in preventing blade damage and accidental cuts.
A Quick Setup Checklist
- Pick a storage method based on your kitchen size and peeler type
- Add a divider, sheath, or cover to protect the blade
- Dry the peeler fully before putting it away
- Store it blade-down or blade-covered for safety
- Keep it away from direct heat and trapped moisture
- Clean the storage spot now and then
- Check the blade occasionally for rust or dullness
Final Thoughts
Storing a kitchen peeler the right way isn’t complicated, but it makes a real difference in how long the tool lasts and how safe your kitchen feels day to day. A few small changes, like adding a drawer divider, mounting a magnetic strip, or simply drying the blade before you put it away, add up to a cleaner, safer, and more efficient kitchen.
Once you find a storage method that fits your space and cooking style, you’ll notice how much smoother meal prep feels. No more digging through cluttered drawers, no more surprise nicks, and no more rusty blades ruining your favorite tool. A little bit of organization goes a long way, and your peeler will thank you with years of smooth, sharp performance.

Mary is a home cooking enthusiast and kitchen gear reviewer with a passion for practical cookware and food preparation tools. She enjoys testing cutting boards, knives, kitchen gadgets, and other cooking essentials to help home chefs make smarter buying decisions. Through KitchenCutting.com, Mary shares honest product reviews, buying guides, and helpful kitchen tips to make cooking easier, safer, and more enjoyable.