How to Cut a Turkey?
Cutting a turkey can feel scary if you have never done it before. The bird looks big, the bones seem tricky, and everyone at the table is waiting for their plate. But here is the truth: carving a turkey is not hard once you know the steps. With the right tools and a bit of patience, you can slice a turkey like a pro in under fifteen minutes.
In this article
This guide walks you through every step in plain, easy language. No fancy terms, no confusing tricks. Just clear steps you can follow the first time you try.
Why Learning to Carve a Turkey Matters
A turkey dinner is often the star of a big family meal. If you cut it the wrong way, you end up with dry meat, torn skin, and a messy plate. If you cut it the right way, every slice looks clean, the meat stays juicy, and your guests are impressed.
Good carving skills also help you get more meat from the bird. When you cut along the natural lines of the turkey, you waste less and serve more. That means better value for your money and a happier table.
Tools You Need Before You Start
Before you touch the turkey, gather these tools. Having them ready saves time and stress later.
- A sharp carving knife with a long, thin blade
- A sturdy cutting board with grooves to catch juice
- A carving fork to hold the meat steady
- Kitchen shears or poultry scissors for tough joints
- A clean platter for the sliced meat
- Paper towels or a kitchen towel for grip and cleanup
A dull knife is the biggest mistake most people make. It tears the meat instead of slicing it. Take two minutes to sharpen your knife before you begin. This one step alone will make the whole process smoother.
Step 1: Let the Turkey Rest
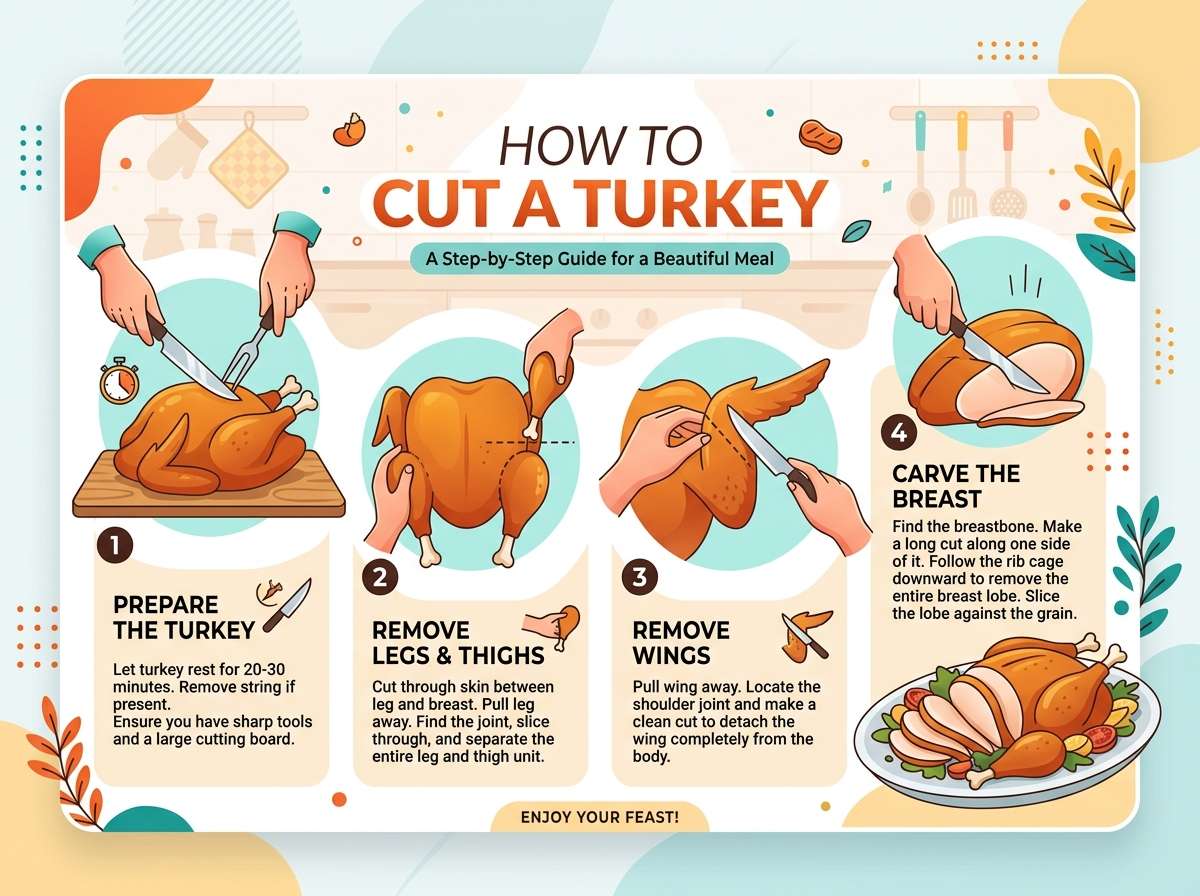
This step gets skipped too often, but it is the most important one. After you take the turkey out of the oven, do not cut it right away. Let it sit for at least twenty to thirty minutes.
During cooking, the juices inside the meat move toward the surface. If you cut too soon, those juices spill out onto the cutting board instead of staying inside the meat. That leaves you with dry, flavorless slices. Resting gives the juices time to move back into the meat fibers, so every bite stays moist and tender.
Cover the turkey loosely with foil while it rests. This keeps it warm without trapping steam that softens the skin.
Step 2: Set Up Your Cutting Station
Place your cutting board on a flat, stable surface. If the board slides around, put a damp towel underneath it to keep it in place. This small trick stops accidents and gives you better control.
Move the turkey from the roasting pan to the cutting board using two large forks or sturdy tongs. Try to keep the bird as steady as possible during the move so the juices stay inside.
Have your platter nearby so you can move slices straight from the board to the plate without extra steps.
Step 3: Remove the Legs First
Start with the legs because they come off easily and give you more room to work with the rest of the bird.
- Pull one leg gently away from the body.
- Use your knife to cut through the skin between the leg and the breast.
- Keep pulling the leg outward until you see the joint that connects it to the body.
- Cut through that joint. It should pop apart easily since it is mostly cartilage, not bone.
- Repeat on the other side.
Once both legs are off, place them on your cutting surface. Each leg has two parts: the thigh and the drumstick. Find the joint that connects them by bending the leg slightly until you feel where it bends naturally. Cut straight through that spot with your knife or shears.
Step 4: Take Off the Wings
Wings are next, and they come off in a similar way to the legs.
- Pull the wing slightly away from the body.
- Locate the joint where the wing meets the breast.
- Cut through that joint with a firm, steady motion.
If the joint feels stiff, use your kitchen shears instead of the knife. Shears give you more control over tough spots and reduce the risk of slipping.
Set the wings aside with the legs. Some people leave the wings whole for serving, while others cut them into two smaller pieces at the joint.
Step 5: Carve the Breast Meat
The breast is the part most people care about most because it holds most of the meat. Here is how to slice it cleanly.
- Find the breastbone running down the center of the turkey.
- Make a long cut along one side of the bone, from the top of the breast down to the bottom, following the shape of the ribcage.
- Once you feel the meat separate from the bone, pull the whole breast half away in one piece and place it on your cutting board.
- Repeat this on the other side of the breastbone to remove the second breast half.
Now that both breast halves are free from the bone, slicing becomes much easier.
- Place one breast half flat on the cutting board, skin side up.
- Hold it steady with your carving fork.
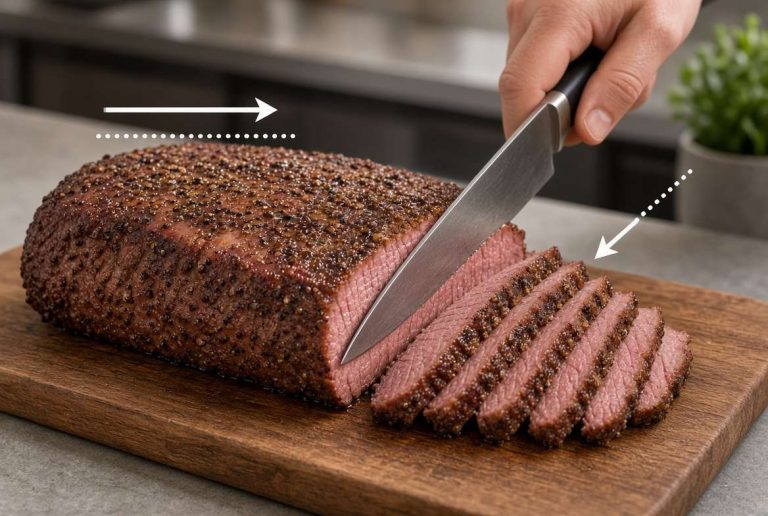
- Slice against the grain, meaning across the muscle fibers, not along them. This makes each piece more tender to chew.
- Cut slices about a quarter inch thick, or slightly thicker if you prefer larger pieces.
Repeat with the second breast half. Keep your knife strokes long and smooth instead of short and choppy. Long strokes give you cleaner slices with less tearing.
Step 6: Arrange the Meat on the Platter
Once all the parts are cut, it is time to arrange everything nicely. Presentation matters, especially for a holiday meal where people take photos or serve buffet-style.
- Lay the breast slices in a fan shape across the middle of the platter.
- Place the legs and thighs on one side.
- Set the wings on the other side.
- Add a few sprigs of fresh herbs like rosemary or parsley for color if you want a nicer look.
- Spoon a little of the pan juices over the meat to keep it moist and shiny.
Serve right away while the turkey is still warm.
Common Mistakes to Avoid
Even experienced cooks slip up sometimes. Here are a few common errors and how to fix them.
Cutting too early. Always give the turkey time to rest before slicing. Skipping this step leads to dry meat every time.
Using a dull knife. A sharp blade glides through meat smoothly. A dull one tears and shreds it, ruining the texture.
Cutting with the grain instead of against it. Slicing with the grain makes meat chewy and stringy. Always slice across the muscle lines for tender bites.
Rushing the process. Take your time with each cut. Rushing leads to uneven slices and wasted meat.
Forgetting the joints. Trying to force a knife through bone is a common mistake. Instead, find the natural joint and cut through the softer cartilage there. It takes far less effort and keeps your knife sharp longer.
Tips for a Smoother Carving Experience
- Warm your knife slightly under hot water before cutting. A warm blade slides through meat more easily than a cold one.
- Keep a damp cloth nearby to wipe your knife between cuts. This keeps the blade clean and prevents dragging skin or fat onto the next slice.
- If you are carving in front of guests, practice once in private beforehand. It builds confidence and helps the real moment go faster.
- Save the turkey carcass and bones after carving. They make a rich base for soup or broth, so nothing goes to waste.
- If part of the skin tears while removing a leg or wing, do not worry. It will not affect the taste, only the look, and you can hide it under other pieces on the platter.
How to Store Leftover Turkey
After the meal, you will likely have leftover meat. Storing it the right way keeps it safe and tasty for days.
- Let the meat cool to room temperature, but do not leave it out for more than two hours.
- Place the sliced meat in an airtight container.
- Store it in the fridge for up to four days, or freeze it for longer storage.
- Label the container with the date so you know how fresh it is later.
Leftover turkey works great in sandwiches, soups, salads, and casseroles. Cutting the bird properly the first time means you get clean, usable pieces for these future meals instead of scraps.
A Quick Recap
Here is the whole process in a short list so you can glance at it while you work:
- Let the turkey rest for twenty to thirty minutes after cooking.
- Set up a stable cutting board and gather your tools.
- Remove the legs by cutting through the joint.
- Remove the wings the same way.
- Cut the breast halves away from the bone.
- Slice the breast meat against the grain.
- Arrange everything neatly on a platter.
- Serve warm and store leftovers properly.
Final Thoughts
Carving a turkey does not need to feel like a stressful task. Once you break it down into small steps, it becomes a simple routine you can repeat every time. The key points to remember are patience, a sharp knife, and cutting along the natural joints and grain of the meat.
With a little practice, you will carve a turkey with confidence, and your table will be full of juicy, well-presented slices that everyone enjoys. The next time you host a big dinner, this guide will help you handle the bird like someone who has done it for years, even if it is only your first or second try.

Mary is a home cooking enthusiast and kitchen gear reviewer with a passion for practical cookware and food preparation tools. She enjoys testing cutting boards, knives, kitchen gadgets, and other cooking essentials to help home chefs make smarter buying decisions. Through KitchenCutting.com, Mary shares honest product reviews, buying guides, and helpful kitchen tips to make cooking easier, safer, and more enjoyable.