Kitchen Knife Maintenance Guide
Kitchen knife maintenance is the set of habits and simple tasks that keep your knives safe, sharp and long-lasting. It covers how you clean, dry, store, hone and sharpen them. Many home cooks never learn these skills, so their knives slowly lose performance over time.
This guide explains each part in plain language. You will learn what a knife is made of, which everyday habits protect the blade, and how honing and sharpening differ. By the end, you will know how to build a simple care routine that fits your kitchen.
Key Takeaways
- Good daily habits, such as hand washing and proper drying, do more to protect a knife than any other step.
- Honing realigns the edge between uses, while sharpening removes metal to create a new edge.
- Store knives in a block, on a magnetic strip or in a sheath so the edge stays protected.
- Use a soft or wooden cutting board, since hard surfaces dull blades quickly.
- A simple daily, weekly and monthly routine keeps your knives ready to use.
Why Kitchen Knife Maintenance Matters
A knife is a tool, and like most tools it works best when it is cared for. Good maintenance keeps cutting easy and safe. It also helps the knife last for many years instead of wearing out early.
Many people think a dull knife only makes cutting slower. In practice, it can also cause accidents. A dull blade needs more force, and that extra force makes it more likely to slip.
How a Sharp Knife Differs from a Dull One
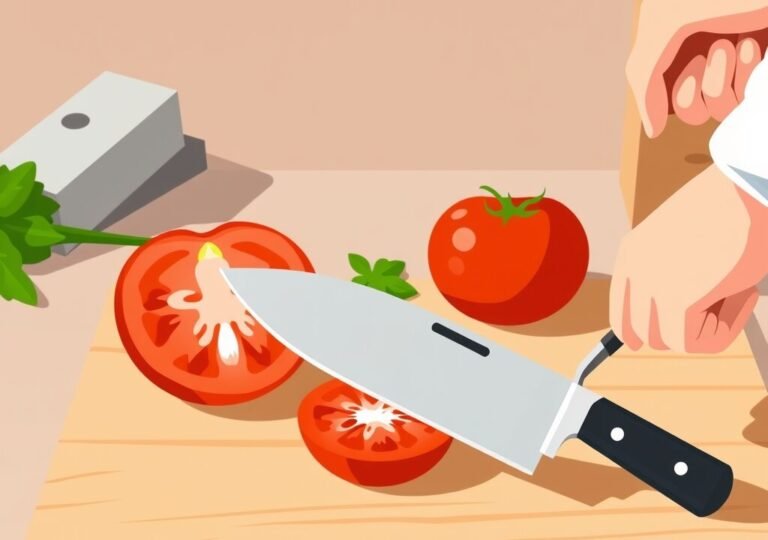
A sharp knife has a thin, clean edge that slices through food with little pressure. A dull knife has an edge that has rolled over or chipped, so it pushes and tears instead. Tomatoes and herbs show the difference quickly.
Because a sharp knife needs less force, you stay in better control. Your cuts also look neater. Food often keeps more of its shape and juices when cut with a sharp blade.
What Happens to a Blade Over Time
Every time you cut, the thin edge bends slightly. Over many uses, it rolls to one side and loses its straight line. This is called edge rolling, and honing can often fix it.
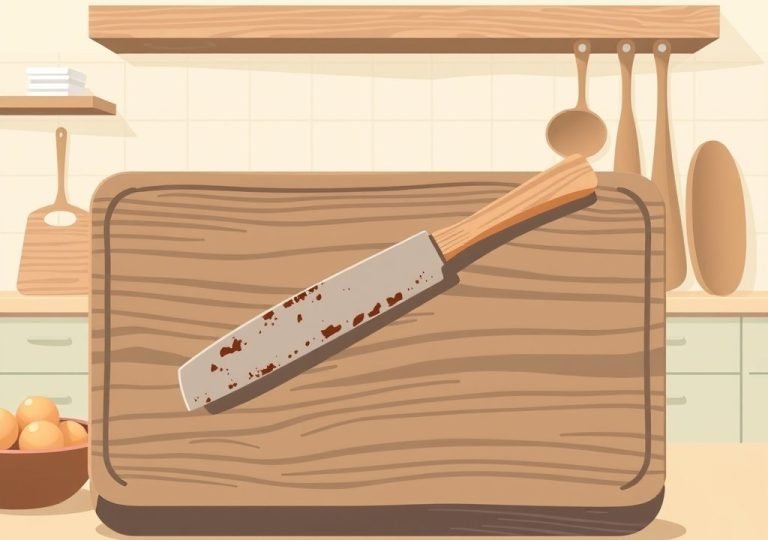
Over longer periods, the steel itself wears away as it is sharpened. Moisture, heat and harsh cleaning can also cause rust, staining or chips. Good care slows all of these changes.
The Parts of a Kitchen Knife
Knowing the parts of a knife helps you understand where wear happens. It also makes it easier to follow care instructions. Each part has a clear role.
Blade, Edge, Spine and Tang
The blade is the main working part of the knife. The edge is the sharp side that does the cutting. The spine is the thick, blunt top edge opposite the cutting edge.
The tang is the part of the metal that extends into the handle. A full tang runs the whole length of the handle, which usually gives better balance and strength. Care for the tang matters most where it meets the handle, since moisture can collect there.
Handle Materials and What They Mean for Care
Handles come in wood, plastic, composite and other materials. Wood looks attractive but can crack or warp if soaked. Many wooden handles should be washed quickly and dried right away.
Plastic and composite handles usually handle moisture better. Even so, they can still be damaged by very high heat, such as a hot dishwasher cycle. Check the care notes that come with your knife.
Everyday Habits That Protect Your Knives
Daily habits make the biggest difference. Small choices each time you cook add up to much better edge life. These habits take only a few seconds.
Cutting on the Right Surface
The surface under your food matters a lot. Wood and soft plastic boards are gentler on the edge than gl ass, stone, ceramic or hard countertops. Hard surfaces can chip or roll the edge quickly, even after a single session of chopping. Wood and plastic boards give slightly under the blade.
That small give helps the edge stay straight for longer. Bamboo is harder than many woods, so it can dull edges faster than softer hardwoods.
Keeping Knives Away from Heat and Moisture
Heat and water are two of the biggest enemies of a knife.
Leaving a blade in a sink full of water can lead to rust spots, especially on carbon steel. Hot air from an oven or dishwasher can also warp handles and loosen rivets.
Keep knives away from the stove edge and from the sink where possible. Wipe them dry as soon as you finish. Put them away only after the blade and handle are fully dry.
Storing Knives Safely in a Block, Magnetic Strip or Sheath
Storage protects both the edge and your fingers. A knife tossed loose in a drawer can bang against metal tools and lose its edge. It can also cut the person reaching in.
A wooden or plastic block keeps each knife in its own slot. A magnetic strip mounts on the wall and holds knives by the spine, leaving the edge exposed but safe from contact. A sheath, sometimes called a blade guard, covers the edge completely and works well for travel or drawer storage. Choose the option that fits your space.
Cleaning and Drying After Each Use
Clean your knife right after you finish cutting. Food acids, such as those in tomatoes, lemons and onions, can stain or pit the blade if they sit too long. Quick cleaning prevents these problems.
Dry the blade completely before storing it. Pay attention to the area where the blade meets the handle, since water often hides there. A clean dry towel works well for this step.
Step-by-Step Guide to Cleaning Your Knives
Cleaning sounds simple, but a few details make a real difference. Using the right method protects both the steel and the handle. The steps below cover the most common approach.
Washing by Hand with Mild Soap
- Rinse the knife under warm running water to remove food bits.
- Apply a small amount of mild dish soap to a soft sponge or cloth.
- Wash the blade gently, moving from the spine toward the edge, and keep your fingers away from the cutting side.
- Rinse off all soap residue.
- Dry the blade and handle immediately with a clean towel.
Always wash knives separately from other dishes. This avoids bumps and keeps your fingers safe in a crowded sink. Work slowly and keep your hands clear of the edge at all times.
Why Dishwashers Can Damage Blades
Dishwashers can harm knives in several ways. Strong jets of water can knock blades against other items and dull the edge. Harsh detergents can cause pitting and discoloration, and the long, hot cycle can loosen handles.
Most knife makers advise hand washing for this reason. If a knife is labeled dishwasher safe, check the care notes first. Even then, hand washing usually gives the longest life.
Drying and Polishing Stainless Steel and Carbon Steel
Stainless steel resists rust better than carbon steel, but it is not rust-proof. Water spots and stains can still appear if the blade air dries. Wipe it dry and store it promptly.
Carbon steel needs more attention. It can rust quickly if left damp, and it may develop a darker patina over time. Dry it thoroughly after every wash. A light coat of food-safe mineral oil can help if you store carbon steel knives for a long period.
How to Hone a Knife at Home
Honing is a quick task that keeps the edge straight between sharpenings. It is one of the most useful habits a beginner can learn. Regular honing means less frequent sharpening.
What Honing Does and What It Does Not Do
Honing realigns the edge that has rolled to one side. It does not remove much metal, so it does not create a truly new edge. Think of it as straightening a bent edge rather than grinding a new one.
Honing works well between sharpenings. It is quick, and a few passes on a honing rod can restore cutting feel. Over time, though, the edge will still wear down and need proper sharpening.
Using a Honing Rod, Step by Step
- Hold the honing rod upright on a stable surface, with the tip resting on a towel or cutting board.
- Hold the knife at a small angle to the rod, roughly the same angle as the blade edge.
- Draw the blade down and across the rod, from the heel near the handle to the tip, in one smooth motion.
- Repeat on the other side of the rod, alternating sides a few times.
- Test the edge on a piece of paper or a soft tomato skin to check the result.
Keep light, even pressure throughout. Pressing hard does not help and can bend the thin edge. Slow, steady strokes give the best results for beginners.
Signs Your Knife Needs Honing
A knife that slides over tomato skin instead of cutting into it may need honing. Food that looks crushed or torn rather than sliced is another sign. You may also notice that the knife feels less precise when you cut straight lines.
Many cooks hone their knives every time they use them, or at least once a week. Pay attention to how the knife feels, and adjust your routine to match your cooking.
How to Sharpen a Knife for Beginners
Sharpening removes a small amount of metal to form a fresh, sharp edge. It takes more time and practice than honing. Beginners often start with simple tools and build confidence slowly.
Whetstones, Pull-Through Sharpeners and Other Options
A whetstone is a flat block with a rough or fine surface. You soak or wet it and then slide the blade across it at a set angle. Whetstones give the most control, but they require practice.
Pull-through sharpeners have fixed slots that guide the blade. You drag the knife through them a few times. They are quick and simple, though they can remove more metal than necessary if used often.
Picking the Right Sharpening Angle
The sharpening angle is the angle between the blade and the stone or guide. Most Western kitchen knives are sharpened at a fairly low angle, while many Asian knives use a sharper, narrower angle. Check the maker’s guidance if you know the knife’s style.
Keep the angle steady throughout each stroke. Small changes can round the edge or create an uneven bevel. A simple marker trick, coloring the edge and watching where the ink wears away, can help beginners see their angle.
Working Through Coarse and Fine Grits
Grit describes how rough or fine a sharpening surface is. Coarse grits remove metal faster and repair damaged edges. Fine grits polish the edge and make it smoother and sharper.
Start with a coarser stone only if the edge is badly dulled or chipped. Finish on a finer stone for a clean, refined edge. Move slowly and avoid rushing the process.
Testing Sharpness Safely
Test sharpness with care. Slide the edge gently across a piece of paper or a tomato skin, rather than testing with a finger. A sharp knife will slice cleanly without much pressure.
Never run a thumb along the edge to check. Even a dull knife can cut when it slips. Safe testing protects you while you learn.
Comparing Sharpening Methods
Each sharpening method has strengths and limits. Knowing these helps you choose the right option for your kitchen and your skill level. There is no single answer for everyone.
Manual Whetstones Versus Pull-Through Tools
Whetstones offer control and can produce a refined edge. They take practice and time, and they need soaking and cleanup. Pull-through tools are fast and easy but offer less control over the final edge.
For a beginner who wants simplicity, a pull-through tool may feel easier at first. A person who enjoys learning a new skill may prefer a whetstone over time. Both can work well when used with care
Both approaches can work well when used with care. Your choice often depends on how much time you want to spend and how much control you want over the edge.
Electric Sharpeners and Their Trade-Offs
Electric sharpeners use motorized wheels or belts to sharpen a blade quickly. You guide the knife through a set of slots, and the machine does most of the work. They are convenient for busy kitchens.
The trade-off is speed versus precision. Electric models can remove metal quickly, so they may wear a blade faster than a careful manual method. Look for a model that offers gentle, controlled sharpening if you choose this route.
Professional Sharpening Services and When to Use Them
A professional sharpener can restore a badly damaged edge that home tools struggle to fix. Many knife shops and local services offer this work. They often use specialized equipment and years of training.
Consider a professional service if a knife has a chip, a large area of rolled edge, or a shape you do not feel comfortable sharpening yourself. Expensive or valuable knives are also good candidates. Ask the service how they set the angle before you hand over the blade.
Common Mistakes Beginners Make
Most beginner mistakes are easy to avoid once you know them. Spotting them early saves time and protects your knives. Each one has a simple fix.
Overusing Steel Rods and Grinding Too Much Metal
Some people hone so hard and so often that the edge wears down faster. A honing rod is for alignment, not for heavy grinding. Use light strokes and keep honing sessions short.
The same goes for sharpening. Removing too much metal makes the blade thinner and weaker over time. Sharpen only when honing no longer restores the edge.
Storing Knives Loose in a Drawer
Tossing knives into a drawer with forks and spoons is one of the fastest ways to dull them. The edges knock against metal, and the blades can scratch each other. This habit also creates a cut risk when you reach in.
Use a block, magnetic strip or sheath instead. Even a simple blade guard in a drawer makes a big difference.
Using the Wrong Cutting Board
Glass, stone and marble boards may look elegant, but they are very hard on knife edges. Each cut can chip or roll the blade. Switching to wood or softer plastic is one of the simplest upgrades a cook can make.
Keep a separate board for raw meat if you can. This also helps with food safety, which matters in any kitchen.
Maintenance Schedule: Daily, Weekly and Monthly Tasks
A simple routine keeps care manageable. You do not need a long checklist. Matching small tasks to different time frames makes the habit easier to keep.
Quick Daily Checks
After each use, wash, dry and put the knife away. Check the edge quickly by feel or by a gentle slice through a soft food. Note any chips or rust spots so you can address them soon.
These steps take only a minute or two. Over time, they become second nature.
Weekly Honing Routine
Once a week, hone the knives you use most often. Use a few light, controlled passes on each side of the honing rod. Then test the edge on paper or a tomato.
A regular weekly session keeps the edge straight and reduces how often you need to sharpen. For many home cooks, this is enough between sharpening sessions.
When to Schedule Professional Sharpening
Plan professional sharpening when honing no longer restores the edge, or when you notice chips or heavy rolling. The timing depends on how often you cook and how hard you use your knives. Some people book a service once or twice a year, while others go longer.
Keep the blade clean and dry before dropping it off. This helps the sharpener see the edge clearly.
Frequently Asked Questions
How often should I sharpen my kitchen knives?
Most home cooks sharpen their knives only a few times a year, depending on use. Regular honing between sharpenings helps the edge last longer. Pay att ention to how the knife cuts, since that is the best guide. When food starts to tear instead of slice, it is time to act.
Can I put kitchen knives in the dishwasher?
Dishwashers are generally not recommended for kitchen knives. Water jets, harsh detergents and long hot cycles can dull the edge, stain the steel and loosen handles. Hand washing with mild soap and quick drying is the safer choice for most knives.
What is the difference between honing and sharpening?
Honing realigns an edge that has rolled to one side, and it removes very little metal. Sharpening removes a small amount of metal to form a new, sharp edge. Honing is for maintenance between sharpenings, while sharpening is for restoring real cutting power.
What type of cutting board is best for knife care?
Wood and softer plastic boards are generally the gentlest choices for knife edges. They give slightly under the blade, which helps the edge stay straight. Glass, stone and marble boards are much harder on blades and should be avoided for regular chopping.
Why does my knife rust, and how do I prevent it?
Rust forms when steel stays damp or is exposed to moisture and salt. Carbon steel is especially prone to it, though stainless steel can also stain. Dry the knife fully after each wash, store it in a dry place, and avoid leaving it soaking in water.
Conclusion
Kitchen knife maintenance is a set of simple habits that pay off over time. Washing and drying by hand, using a gentle cutting surface and storing knives safely protect the edge every day. Honing keeps the blade straight between sharpenings, and sharpening restores the cutting power when needed.
Start small with one or two habits and build from there. A steady routine of daily care, weekly honing and occasional sharpening keeps your knives safe, sharp and ready for everyday cooking.

Mary is a home cooking enthusiast and kitchen gear reviewer with a passion for practical cookware and food preparation tools. She enjoys testing cutting boards, knives, kitchen gadgets, and other cooking essentials to help home chefs make smarter buying decisions. Through KitchenCutting.com, Mary shares honest product reviews, buying guides, and helpful kitchen tips to make cooking easier, safer, and more enjoyable.