How to Cut Chicken Breast Into Strips?
Cutting chicken breast into strips sounds like a small task, but it can make or break your meal. Uneven strips cook at different speeds. Some pieces turn dry and tough while others stay raw in the middle. The good news is that this skill is easy to learn once you know the right steps.
In this article
In this guide, you will learn how to cut chicken breast into neat, even strips every single time. We will cover the tools you need, the best way to prep your chicken, the cutting method itself, and some handy tips that make the whole process faster and safer. By the end, you will feel confident enough to slice chicken like someone who has done it for years.
Why Cutting Chicken Into Strips Matters
Chicken strips are used in so many dishes. Stir fry, fajitas, chicken salad, wraps, skewers, and even baked chicken tenders all start with strips of raw chicken breast. When your strips are the same size, they cook evenly. This means no dry edges, no undercooked centers, and no guesswork about when the chicken is done.
Even cuts also help with flavor. Marinades and seasonings soak into thin strips faster than into a thick chunk of meat. So if you want juicy, flavorful chicken, learning to cut it properly is the first real step.
Tools You Need Before You Start
You do not need fancy equipment to cut chicken breast into strips. Here is a short list of what works best:
- A sharp chef’s knife or a boning knife
- A sturdy cutting board, ideally plastic for raw meat
- Paper towels for drying the chicken
- A clean kitchen towel or non-slip mat under the cutting board
- A bowl or plate to hold the finished strips
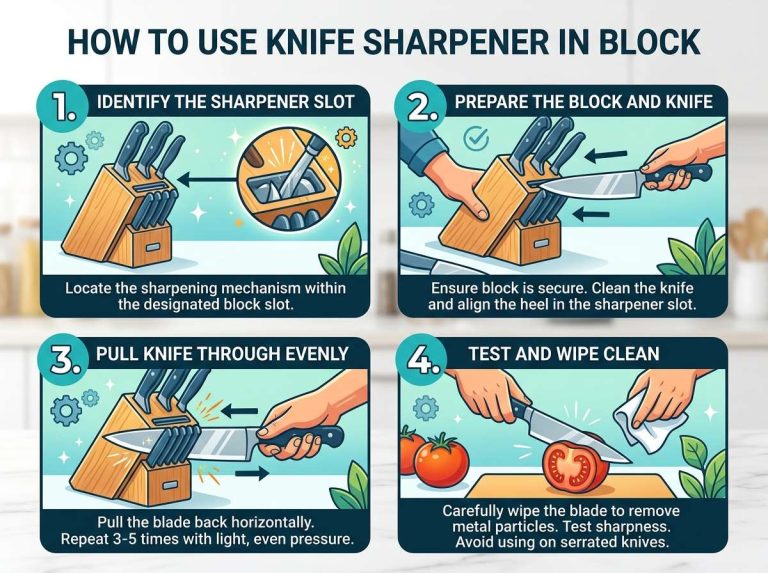
A sharp knife is the most important item on this list. A dull blade slips and tears the meat instead of slicing it cleanly. It also puts you at higher risk of cutting yourself, since you end up pressing harder than needed. If your knife has not been sharpened in a while, now is a good time to fix that before you begin.
Step 1: Chill the Chicken First
This is a trick that professional cooks rely on, and it works wonders for home cooks too. Chicken breast is soft and slippery when it sits at room temperature. Slicing it into thin, even strips becomes much harder because the meat wobbles and squishes under the blade.
Place your chicken breast in the freezer for about fifteen to twenty minutes before you cut it. You are not trying to freeze it solid, just firm it up a little. This small step gives you much more control over your knife and results in cleaner, straighter cuts.
If your chicken is already frozen, let it thaw in the fridge until it is still cold but flexible enough to bend slightly. That firm-yet-soft texture is the sweet spot for cutting.
Step 2: Dry the Chicken and Set It on a Stable Surface
Pat the chicken breast dry with paper towels. Wet meat is slippery and harder to grip, so drying it first gives your knife better traction and reduces the chance of an accidental slip.
Place a damp kitchen towel or a non-slip mat under your cutting board. This keeps the board from sliding around while you work. A board that shifts under pressure is one of the most common reasons people cut themselves in the kitchen, so this tiny step matters more than it seems.
Step 3: Trim the Chicken Breast
Before slicing into strips, take a moment to trim off anything you do not want in your final dish. Look for:
- The thin white tendon that runs along one side
- Any visible fat
- Loose bits of skin or connective tissue
Use the tip of your knife to gently remove these parts. Trimming first makes the rest of the cutting process smoother, since you are not fighting through tough bits halfway through slicing.
Step 4: Even Out the Thickness
Chicken breasts are naturally uneven. One end is thick, and the other tapers off thin. If you skip this step, your strips will vary wildly in thickness no matter how carefully you slice them later.
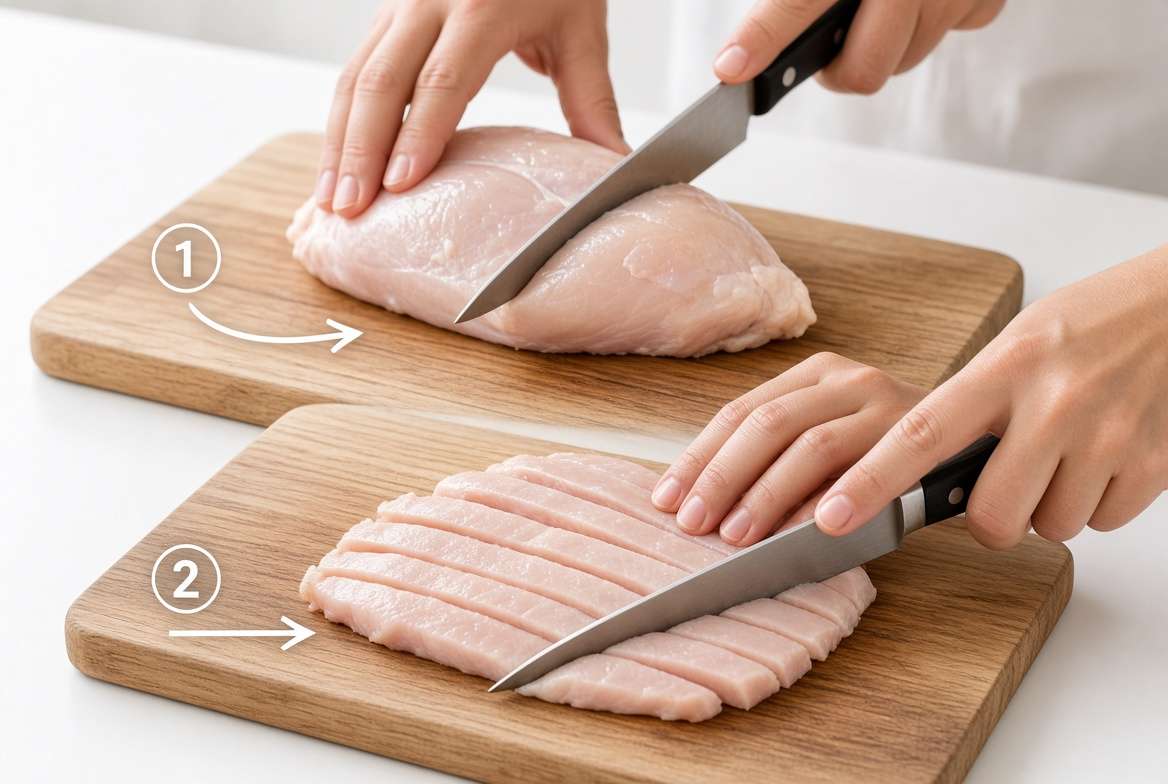
To fix this, place the chicken flat on the cutting board. Hold it steady with one hand and use your knife to slice horizontally through the thickest part, almost like you are opening a book. This is called butterflying. You do not need to cut all the way through; just even out the thickness so the whole piece is roughly the same height from end to end.
If butterflying feels tricky at first, another option is to gently pound the thicker end with a meat mallet until it matches the thinner side. Place the chicken between two sheets of plastic wrap first so things stay tidy.
Step 5: Decide Which Direction to Slice
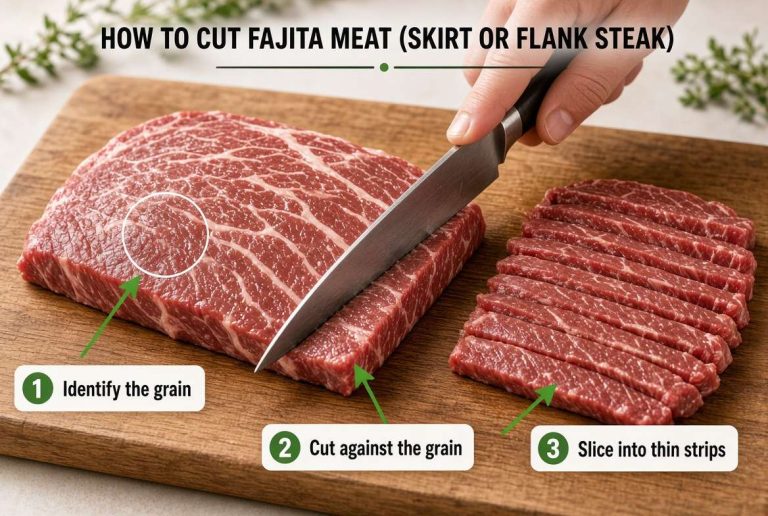
This step is where most beginners get confused, but it is actually simple once explained. Chicken breast has muscle fibers that run in one direction, like tiny threads lined up in a row. You can usually see these lines if you look closely at the surface of the meat.
For tender strips, slice against the grain. This means your knife should cut across those muscle fibers rather than running parallel to them. Cutting against the grain shortens the fibers, which makes the finished strips easier to chew and less rubbery.
If you slice with the grain instead, the fibers stay long and stringy, and the chicken can feel tough even after cooking. So take a second before you start slicing to notice which way the grain runs, then plan your cuts to go across it.
Step 6: Slice Into Strips
Now for the main event. Hold the chicken breast steady with your non-dominant hand, curling your fingertips slightly inward and away from the blade for safety. With your other hand, grip the knife firmly and begin slicing.
Here is a simple method to follow:
- Start at one end of the chicken breast.
- Cut straight down in smooth, steady strokes rather than sawing back and forth.
- Aim for strips about half an inch wide, though you can go thinner for stir fry or thicker for skewers.
- Keep your slices parallel to each other so every strip comes out roughly the same width.
- Move your guiding hand back slightly after each cut to keep your fingers safe.
Try to use one long, confident stroke per cut rather than several short ones. This gives you a cleaner edge and prevents the meat from tearing.
Step 7: Check for Even Sizes
Once you finish slicing, take a quick look at your strips. If a few pieces are noticeably thicker or thinner than the rest, trim them down or cut them again. This extra thirty seconds of checking saves you from uneven cooking later, when some strips are perfectly done and others are still pink in the middle.
Common Mistakes to Avoid
Even simple tasks have a few traps that catch beginners off guard. Here are the most common ones when it comes to cutting chicken breast:
Using a dull knife. A sharp blade glides through meat with ease, while a dull one drags and tears. Sharpen your knife regularly or invest in a basic knife sharpener.
Cutting with the grain instead of against it. As mentioned earlier, this leads to chewy, stringy strips that are less enjoyable to eat.
Slicing chicken at room temperature. Warm chicken is soft and hard to control, leading to uneven strips.
Rushing the process. Cutting too fast increases the risk of injury and often results in messy, mismatched pieces.
Skipping the trimming step. Leftover fat or tendon can affect both texture and flavor once cooked.
Not drying the meat first. Wet chicken slips around on the cutting board, making it harder to control your knife.
Avoiding these small mistakes goes a long way toward getting restaurant-quality strips at home.
Food Safety Tips While Cutting Raw Chicken
Raw chicken carries bacteria like salmonella, so a few safety habits are worth building into your routine every time you cook with it.
- Use a separate cutting board for raw meat, ideally one made of plastic since it is easier to sanitize than wood.
- Wash your hands with soap and warm water before and after handling raw chicken.
- Clean your knife, cutting board, and countertop with hot soapy water right after you finish cutting.
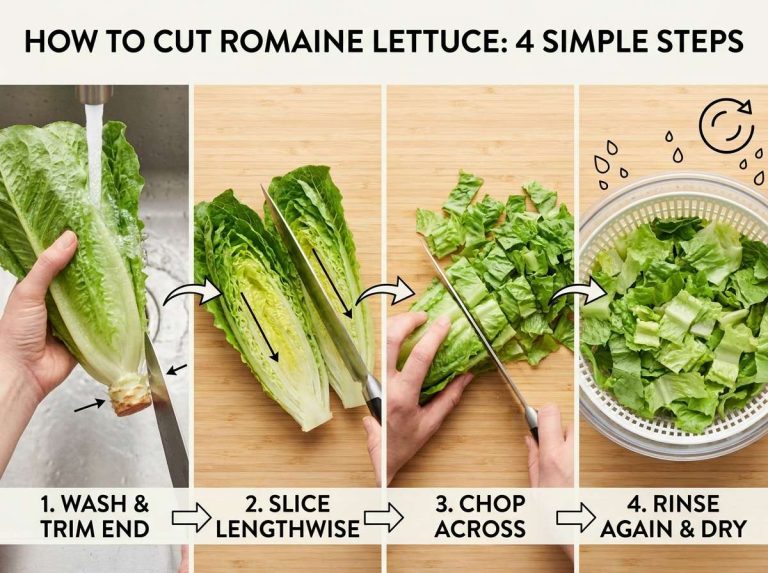
- Avoid letting raw chicken juices touch other foods, especially anything that will be eaten raw, like salad greens.
- Keep raw chicken refrigerated until you are ready to cut it, and do not leave it sitting out for more than a short while.
These habits take only a minute or two but protect you and anyone else eating the meal from foodborne illness.
Different Strip Sizes for Different Dishes
Not every recipe calls for the same size strip. Here is a quick guide depending on what you plan to cook:
Stir fry: Thin strips, about a quarter inch wide, cook fast and soak up sauce nicely.
Fajitas: Slightly wider strips, around half an inch, hold their shape well on a hot skillet or grill.
Chicken tenders or fingers: Thicker strips, close to three quarters of an inch, give you that classic bite people expect from breaded chicken tenders.
Skewers: Cut chunkier pieces if you plan to thread them onto skewers, since thin strips can fall apart or overcook quickly on a grill.
Salads and wraps: Medium strips work best here, thin enough to bite through easily but thick enough to stay juicy.
Adjusting your strip size based on the dish is a small detail that makes a noticeable difference in the final result.
How to Store Chicken Strips After Cutting
If you are not cooking the strips right away, proper storage matters just as much as the cutting itself.
Refrigerator: Place the strips in an airtight container or a sealed bag and store them in the fridge. Use them within one to two days for the best taste and texture.
Freezer: Lay the strips flat on a tray lined with parchment paper and freeze them for about an hour before transferring them to a freezer bag. This keeps them from sticking together, so you can grab just the amount you need later.
Marinating: If you plan to marinate the strips, do this in the fridge, never on the counter. A couple of hours is usually enough for chicken breast to soak up flavor, though some marinades work overnight for a deeper taste.
Extra Tips for Faster, Easier Cutting
A few small habits can speed up the whole process once you get comfortable with the basic method.
- Buy chicken breasts that are similar in size and shape so your prep time stays consistent.
- Keep your knife sharpening tool nearby so you can quickly touch up the blade if it starts to drag.
- Cut a large batch at once and freeze portions for future meals, saving you time on busy days.
- Practice on a few pieces before cooking for guests, since confidence with the knife grows with repetition.
- Watch a few short cooking demonstrations online if you are a visual learner, since seeing the hand movement can make the technique click faster than reading alone.
Frequently Asked Questions
Is it easier to cut chicken breast when it is frozen or thawed? Partially frozen chicken is easier to cut than fully thawed chicken because it holds its shape better under the knife. Fully frozen chicken, on the other hand, is too hard to slice safely.
Why do my chicken strips shrink so much when I cook them? Some shrinkage is normal since chicken loses moisture as it cooks. Cutting against the grain and avoiding overcooking helps reduce excess shrinkage.
Can I use scissors instead of a knife? Kitchen shears can work in a pinch, especially for trimming fat, but a sharp knife gives you far more control for slicing even strips.
How thin should chicken strips be for stir fry? Around a quarter inch wide works well for stir fry, since thin strips cook quickly and absorb sauce nicely.
Do I need to remove the skin before cutting into strips? Most recipes that call for chicken strips use skinless chicken breast, so it is best to remove the skin first if your chicken still has it.
Final Thoughts
Cutting chicken breast into strips is one of those kitchen skills that feels tricky at first but becomes second nature with a little practice. The secret lies in a few key habits: chilling the chicken slightly, drying it well, evening out the thickness, slicing against the grain, and using smooth, steady knife strokes.
Once you get the hang of it, you will notice a real difference in how your meals turn out. Strips cook evenly, soak up marinades better, and taste more tender with every bite. Practice this a few times and you will find yourself slicing chicken breast with the same ease as chopping an onion or dicing a tomato.
Take your time, keep your knife sharp, and follow good safety habits every time you handle raw chicken. With these simple steps, you are well on your way to prepping chicken like a seasoned home cook.

Mary is a home cooking enthusiast and kitchen gear reviewer with a passion for practical cookware and food preparation tools. She enjoys testing cutting boards, knives, kitchen gadgets, and other cooking essentials to help home chefs make smarter buying decisions. Through KitchenCutting.com, Mary shares honest product reviews, buying guides, and helpful kitchen tips to make cooking easier, safer, and more enjoyable.