
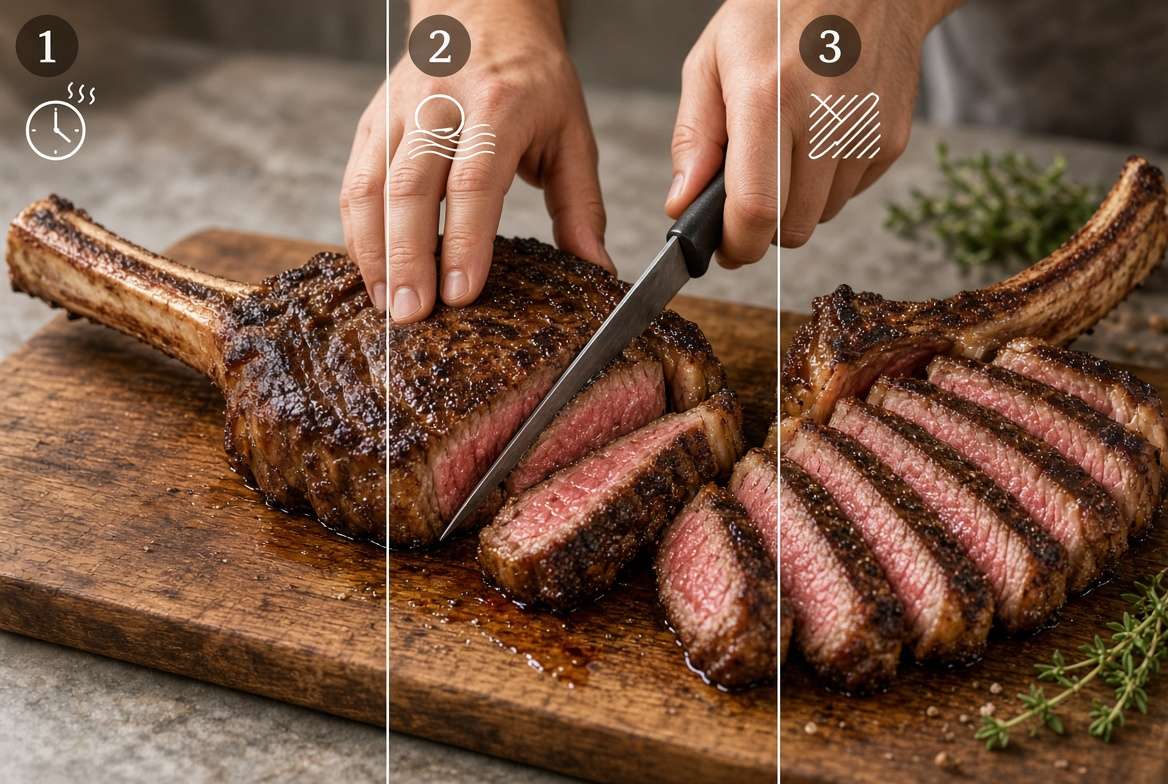
How to Cut a Tomahawk Steak?
A tomahawk steak is one of the most impressive cuts of meat you can bring to a dinner table. It has a long bone sticking out like a handle, thick juicy meat, and a look that makes people stop and stare before they even take a bite. But here’s the thing: cooking it well is only half the job. If you cut it the wrong way, you can turn a tender, flavorful steak into something chewy and hard to eat.
In this article
The good news is that cutting a tomahawk steak is not hard once you know the basic steps. In this guide, we will walk through everything from start to finish, using plain language and simple steps so even a total beginner can follow along with no stress at all.
By the end of this article, you will know how to rest the meat, find the grain, slice it properly, and serve it in a way that looks like it came from a steakhouse.
What Exactly Is a Tomahawk Steak?
A tomahawk steak is basically a ribeye steak that still has a long piece of rib bone attached to it. That long bone is what gives it its name, since it looks a bit like a tomahawk axe. The meat itself comes from the rib section of the cow, which is known for being rich, marbled, and full of flavor.
Because of the bone and the thickness of the cut, a tomahawk steak is usually much bigger than your average steak. It can weigh anywhere from two to three pounds, sometimes more. This means one tomahawk steak can easily feed two or three people, so it’s a great option for a special dinner or a gathering with family and friends.
Since it’s such a large and pricey cut, knowing how to cut it properly really matters. You want every bite to be tender, not tough, and you want the presentation to look as good as the taste.
Why Cutting Technique Actually Matters
Some people think that once a steak is cooked, the hard part is over. But cutting the steak the right way can make a huge difference in texture. Meat is made of muscle fibers that run in a certain direction, and this direction is called the grain.
If you cut along the grain instead of against it, the muscle fibers stay long and stringy. That makes the meat harder to chew, even if it was cooked perfectly. On the other hand, cutting against the grain shortens those fibers, which makes each bite soft and easy to eat.
This is especially important with a tomahawk steak because it’s thick and the grain can run in slightly different directions depending on where you’re slicing. Getting this part right is the secret behind a steak that melts in your mouth instead of one that feels like a workout for your jaw.
Tools You’ll Need Before You Start
Before you even think about slicing, gather a few basic tools. Having the right setup makes the whole process smoother and safer.
Here’s what you should have ready:
- A sharp chef’s knife or a carving knife
- A large cutting board with enough space
- A meat thermometer, if you haven’t already used one during cooking
- Tongs for handling the hot steak
- A serving platter for the sliced meat
- Aluminum foil for resting the steak
A dull knife is one of the biggest mistakes people make. It tears the meat instead of slicing it cleanly, and it also raises the risk of the knife slipping. Take a minute to sharpen your knife before you begin, since this small step makes everything easier later on.
Step 1: Let the Steak Rest First
This step gets skipped a lot, but it’s one of the most important parts of the whole process. Right after cooking, the juices inside the steak are moving around fast because of the heat. If you cut into it right away, those juices will spill out onto the cutting board instead of staying inside the meat.
Letting the steak rest gives the juices time to settle back into the muscle fibers. This keeps the meat moist and flavorful instead of dry.
For a tomahawk steak, because it’s so thick, you’ll want to rest it for around fifteen to twenty minutes. Loosely tent it with aluminum foil so it stays warm but doesn’t keep cooking too much from trapped heat.
During this time, you can prepare your cutting board, get your knife ready, and set the table. It’s the perfect moment to plate any side dishes too.
Step 2: Find the Bone and Set It Aside
A tomahawk steak has one long rib bone running along one edge. Before slicing the meat into pieces, it’s smart to separate the meat from the bone first. This makes the rest of the cutting process much easier and gives you cleaner slices.
Here’s how to do it:
Place the steak on your cutting board with the bone facing up or to the side, so you can see where it connects to the meat. Use your knife to carefully run it along the length of the bone, keeping the blade as close to the bone as possible. Slowly separate the meat away from the bone in one smooth motion, rather than sawing back and forth.
Once the bone is removed, set it aside. Some people like to save the bone for making stock or broth later, so don’t toss it out if you enjoy cooking extra meals from leftovers.
Now you’re left with a large, boneless piece of ribeye meat that’s much easier to work with.
Step 3: Look for the Grain
This is the step that trips up a lot of beginners, but it’s actually simple once you know what to look for.
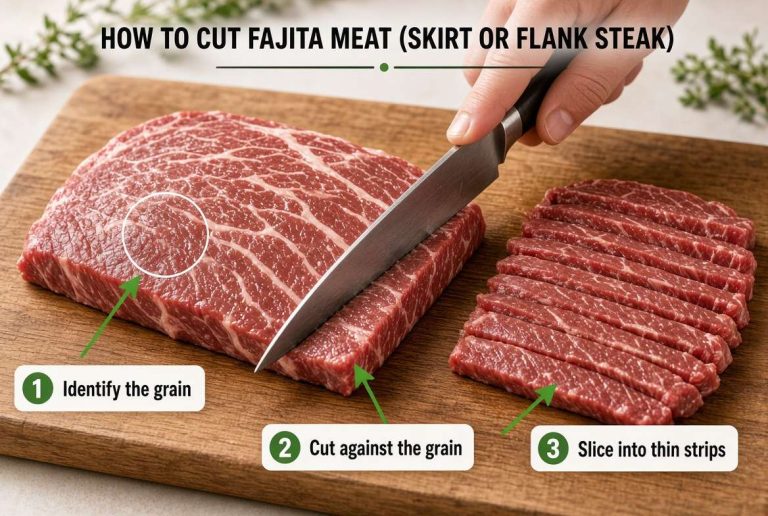
Take a close look at the surface of the meat. You’ll notice thin lines running across it, almost like the lines you’d see on a piece of wood. These lines are the muscle fibers, and the direction they run in is called the grain.
With a tomahawk steak, the grain can shift slightly in different sections because of how the ribeye muscle is shaped. Take a moment to really study the meat before making your first cut, since spotting the grain correctly is the key to a tender result.
If you’re having trouble seeing it, try tilting the steak under a bright light or gently pulling apart a small section with your fingers. The fibers will separate in the direction of the grain, giving you a clear visual guide.
Step 4: Slice Against the Grain
Now for the main event. Once you know which direction the grain runs, you want to slice in the opposite direction, cutting across those fibers rather than along them.
Hold your knife at a slight angle, around forty-five degrees, rather than straight up and down. This angle helps create wider, more attractive slices and also makes the meat easier to chew.
Use smooth, even strokes instead of sawing back and forth. A clean pull-through motion keeps the meat’s texture intact and prevents it from getting mashed or torn.
For thickness, aim for slices about half an inch wide. This size is thick enough to feel hearty and satisfying, but thin enough to stay tender and easy to eat.
Keep working your way across the steak, always checking that you’re still cutting against the grain. Since the grain direction can shift slightly on a large cut like this, it’s fine to adjust your angle as you move along.
Step 5: Handle the Different Sections Carefully
A tomahawk steak isn’t perfectly uniform throughout. There’s a leaner section and a fattier, richer section, and the grain can behave a little differently between them.
As you slice through the middle of the steak, pay attention to any change in the direction of the fibers. It’s completely normal to need a slight change in your cutting angle halfway through. Don’t be afraid to pause, take a look, and adjust rather than rushing through the whole cut in one direction.
This attention to detail is what separates an average slicing job from one that looks and tastes like it came from a professional steakhouse.
Step 6: Plate It Like a Pro
After all your slices are cut, it’s time to make the presentation shine. This part is honestly a lot of fun and it’s where a tomahawk steak really gets to show off.
Arrange the slices in a slightly overlapping row on your serving platter, fanning them out so the pink, juicy center of each piece is visible. Place the bone back near the meat, either at the top of the platter or resting alongside the slices, to bring back that dramatic tomahawk look.
A sprinkle of flaky salt, some fresh herbs like rosemary or thyme, or a small drizzle of garlic butter on top can add both flavor and a polished finish. These little touches make the dish look like it belongs in a restaurant, even though it was made right in your own kitchen.
Common Mistakes to Avoid
Even with a clear guide, a few mistakes tend to pop up often. Keeping these in mind will help you avoid them.
Cutting the steak too soon after cooking is a big one, since it lets all the flavorful juices run out onto the board instead of staying in the meat. Using a dull knife is another common issue, as it tears the fibers instead of slicing them cleanly, which affects both texture and appearance.
Ignoring the grain direction is probably the most common mistake of all. It’s easy to just start cutting without checking, but this single step has the biggest impact on tenderness. Slicing pieces that are too thick can also make the steak harder to chew, so try to stick to that half-inch guideline as a general rule.
Sawing the knife back and forth instead of using smooth pull-through strokes tends to shred the meat rather than cut it cleanly. A little patience here goes a long way toward a better final result.
A Few Extra Tips for Best Results
If you want to take your tomahawk steak game even further, here are a few bonus tips worth keeping in mind.
Try warming your serving platter slightly before plating, since this helps keep the sliced meat warmer for longer once it’s on the table. Pair the steak with a simple sauce like a red wine reduction, chimichurri, or a classic peppercorn sauce to add extra flavor without overpowering the natural richness of the ribeye.
Serve the steak with sides that balance out the richness, such as roasted vegetables, a fresh green salad, or garlic mashed potatoes. These lighter sides create a nice contrast against the bold, fatty flavor of the meat.
If you have leftovers, store the sliced meat in an airtight container in the fridge and use it within a few days. Leftover tomahawk steak works wonderfully in sandwiches, tacos, or tossed into a warm salad.
Frequently Asked Questions
Can I cut a tomahawk steak while it’s still hot? It’s best to let it rest first. Cutting too early causes the juices to escape, leaving the meat drier than it should be.
Do I need a special knife for this? A regular sharp chef’s knife or carving knife works just fine. The sharpness matters far more than having a special tool.
What if I can’t find the grain easily? Try gently pulling a small piece apart with your fingers or tilting the meat under good lighting. The direction the fibers separate in is the grain.
Should the bone be removed before or after cooking? The bone should stay on during cooking, since it adds flavor and helps the meat cook evenly. Remove it only after cooking and resting, right before slicing.
How many people can one tomahawk steak feed? Since it’s such a large cut, one tomahawk steak can usually feed two to three people comfortably, depending on portion sizes and side dishes.
Final Thoughts
Cutting a tomahawk steak might look intimidating at first because of its size and that dramatic bone, but once you break it down into simple steps, it becomes a lot easier than it seems. Rest the meat, remove the bone, find the grain, slice against it at a slight angle, and plate it with a little care.
With a bit of practice, you’ll be able to slice a tomahawk steak with confidence every single time, giving you tender, juicy bites and a presentation that looks straight out of a high-end steakhouse. Grab your knife, take your time, and enjoy the process just as much as the meal itself.

Mary is a home cooking enthusiast and kitchen gear reviewer with a passion for practical cookware and food preparation tools. She enjoys testing cutting boards, knives, kitchen gadgets, and other cooking essentials to help home chefs make smarter buying decisions. Through KitchenCutting.com, Mary shares honest product reviews, buying guides, and helpful kitchen tips to make cooking easier, safer, and more enjoyable.


One Comment