How Do I Cut A Ham?
Cutting a ham doesn’t have to be scary or complicated. Whether you’re preparing a holiday meal or just want to slice ham for sandwiches, you can do it. This guide will walk you through everything you need to know about cutting ham. You’ll learn the best techniques, the right tools, and some helpful tips to make your job easier.
In this article
Why Knowing How to Cut Ham Matters
Ham is a delicious meat that works for many meals. You might serve it at Easter dinner. You might use it for lunch meat. You might add it to holiday feasts. No matter what you’re doing, you need to know how to cut it properly.
When you cut ham the right way, you get better looking slices. You also waste less meat. Your meal looks nicer when the slices are neat and even. Plus, knowing how to do this saves you money. You don’t need to buy pre-sliced ham if you can do it yourself at home.
Types of Hams and How to Handle Each One
Not all hams are the same. Different types need different cutting approaches. Let’s talk about the main kinds you’ll find.
Bone-In Hams
Bone-in hams still have the bone inside. This is a whole ham cut. The bone runs through the meat and makes cutting a bit trickier. You have to work around it. These hams look great for serving at big meals. Many people like them because they look impressive on a table.
The good news is that bone-in hams actually give you a flavor boost. The bone adds taste to the meat. When you cut one, you’ll need a sharp knife and patience. You’ll make some cuts along the bone and some perpendicular cuts. This creates nice slices while working with the natural shape.
Boneless Hams
Boneless hams have no bone inside. This makes cutting them much simpler. You can slice them in any direction you want. These hams are easier for beginners. You get cleaner slices with less hassle. Many people prefer boneless hams because they’re just more convenient.
Half Hams
Half hams are cut pieces from a whole ham. You get either the shank end or the butt end. These are smaller than whole hams. They still might have a bone, so check before you buy. Half hams are great for smaller gatherings. They’re easier to handle than whole hams.
Spiral Cut Hams
Spiral cut hams are pre-sliced by the butcher. Most of the hard work is done for you. The slices spiral around the bone. You can just pull them apart and serve them. These are perfect if you don’t want to cut anything. They’re convenient but cost a bit more.
Getting Your Tools Ready
Before you start cutting, get the right tools. Good tools make everything easier and safer.
The Best Knife for Ham
You want a long knife for ham. A serrated knife works great. The teeth on the blade help you saw through the meat without crushing it. Look for a knife that’s at least eight inches long. The longer the knife, the easier the job.
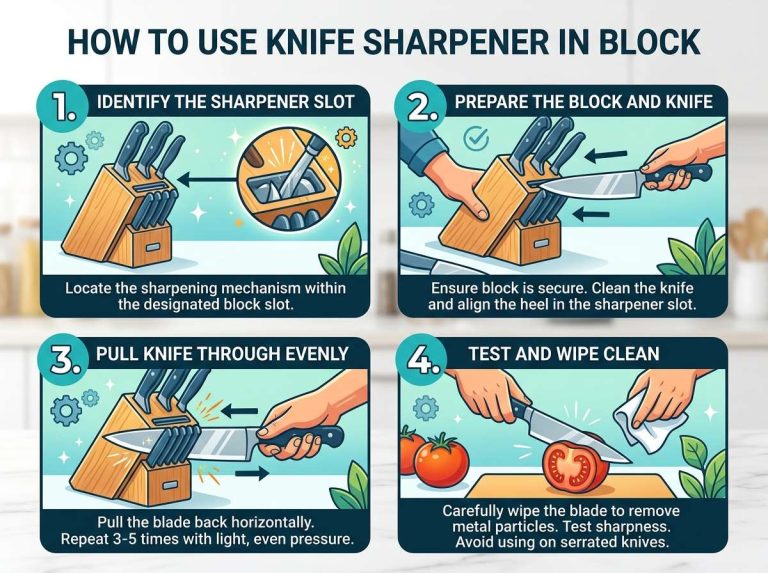
A sharp knife is really important. A dull knife is actually more dangerous than a sharp one. A dull blade slips more easily. A sharp blade cuts cleanly. If your knife is dull, sharpen it before you start. You can use a knife sharpener or go to a butcher and ask them to sharpen it for you.
Other Tools You Might Need
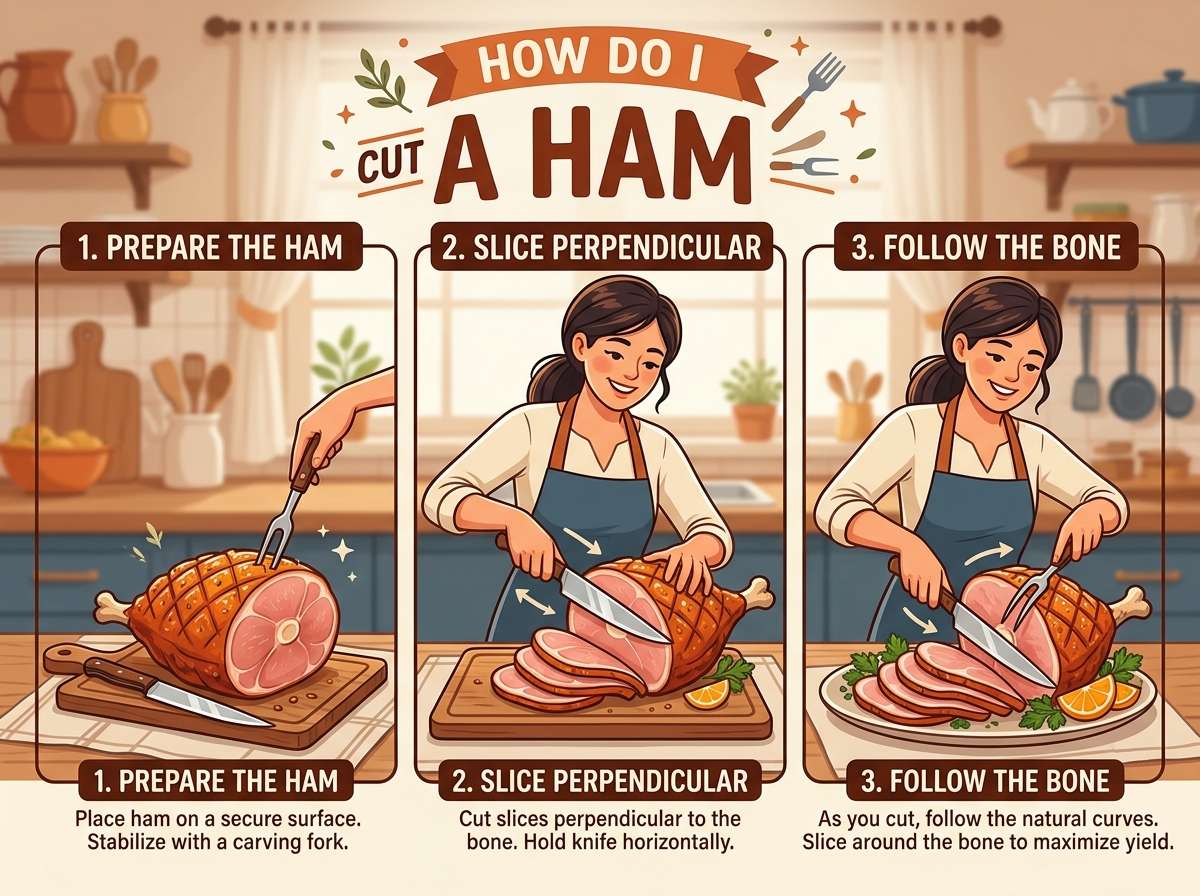
A carving fork helps steady the ham. You hold it in one hand while you cut with the knife in the other. This keeps the meat from sliding around. Many carving sets come with both a fork and a knife.
A cutting board is essential. Use a big one with a groove around the edge. The groove catches the ham juices so they don’t run onto your counter. Wood or plastic boards both work fine. Just make sure it’s big enough for your ham.
Gloves can help. They give you a better grip on the ham. They also protect your hands if you slip. Food grade gloves work, or even kitchen towels wrapped around your hands help.
Preparing Your Ham Before Cutting
Getting your ham ready is just as important as the cutting itself.
Take It Out Early
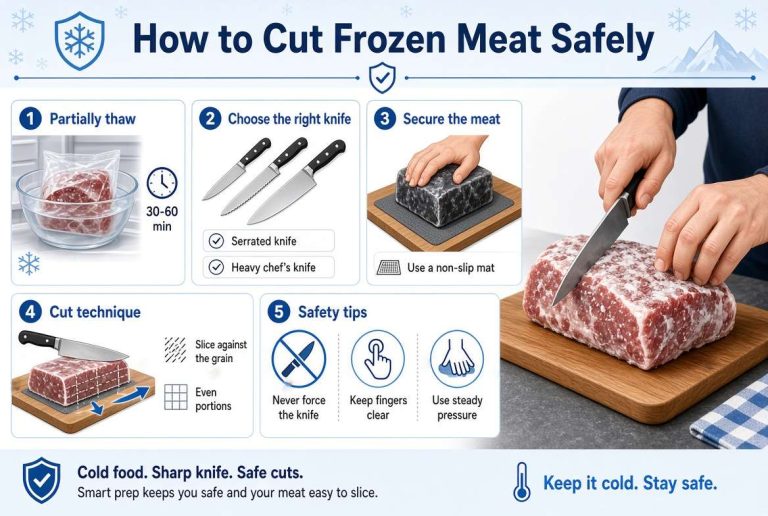
Remove your ham from the refrigerator about thirty minutes before you plan to cut it. A cold ham is harder to slice. The meat is firm and harder to work with. A ham that’s closer to room temperature slices more easily. The slices also look better. The meat is more tender when it’s warmer.
Trim the Skin If You Want
Some hams come with a thick layer of skin on top. This skin gets hard and doesn’t taste good. You can remove it before slicing. Use your sharp knife to cut it away. Cut carefully at an angle. Just cut the skin layer, not too deep into the meat.
Some people like to keep the skin on at first. It helps keep the meat moist while you slice. You can remove it in sections as you work. Do whatever works best for you.
Set Up Your Workspace
Make sure you have lots of space. Put your cutting board in a spot where you have room to work. Put your tools within reach. Have a clean platter ready to hold your sliced ham. This makes the whole process go smoothly.
How to Cut a Whole Bone-In Ham
Now let’s get into the main event. Here’s how to slice a whole bone-in ham step by step.
Step One: Find the Bone
Look at your ham and find the bone. On a bone-in ham, you can usually see where it is. The bone runs down one side of the ham. You’ll see a natural seam or groove that shows where the bone is underneath.
Step Two: Make Your First Cut
Start at the thin end of the ham. This is often called the shank end. Make a cut perpendicular to the bone. Cut straight down. You want to go until you hit the bone. Don’t try to cut through the bone. Stop when your knife touches it.
Step Three: Create Slices
Now make more cuts parallel to that first cut. Slice about three quarters of an inch apart. This gives you nice thick slices for serving. If you want thinner slices, cut closer together. Keep your cuts parallel to the bone.
Step Four: Rotate and Repeat
After you’ve sliced that first section, rotate the ham. Cut slices from a different angle. This lets you get around the bone. You’ll create a pattern where the bone divides the slices naturally.
Step Five: Handle the Other Side
When you get to the other side of the ham, do the same thing. Make cuts perpendicular to the bone. Rotate and angle your cuts to work around the bone shape.
Step Six: Remove Remaining Meat
Once you’ve gotten all the nice slices you can, there’s still meat left. Cut around the bone. Remove the remaining meat in chunks. You can use this for ham salad or other recipes.
How to Cut a Boneless Ham
Cutting a boneless ham is much simpler. You have way more freedom since there’s no bone to work around.
Step One: Position Your Ham
Put your boneless ham on the cutting board. You can slice it any direction you want. Most people slice horizontally. This creates nice round slices.
Step Two: Make Your First Cut
Start at one end. Make a thin cut to get started. This helps establish your cutting angle. Then make a second cut about an inch from the first one. You now have a piece to remove. Save these first pieces, even if they’re not perfect. You can dice them up for other uses.
Step Three: Slice Across
Now slice across the ham. Keep your cuts parallel and even. Aim for slices that are about three quarters of an inch thick. Adjust thickness based on what you need. Some people like thinner slices. Others prefer thick slices for serving.
Step Four: Keep Steady
Use your carving fork to hold the ham steady. Push it into the meat gently. This keeps the ham from rolling around. Work slowly and carefully. There’s no rush.
Step Five: Finish Strong
When you get to the end, the last piece might be small. You can slice it however works best. Add it to your platter with everything else.
Tips for Getting Perfect Slices Every Time
Practice makes perfect. Here are some tricks to improve your technique right away.
Use a Serrated Knife
A serrated blade really is better than a straight blade for ham. The teeth help grip the meat. They saw through without crushing. This is one simple change that makes a big difference.
Keep Your Knife Wet
Dip your knife in water between cuts. This prevents the meat from sticking to the blade. The slices come off cleaner. Your knife glides through easier. It’s a small step that helps a lot.
Cut in One Motion
Don’t saw back and forth too much. Use smooth, steady strokes. Let the knife do the work. Push down and pull back in one smooth motion. This creates nicer looking slices with clean edges.
Stay Patient
Don’t rush. The more carefully you work, the better your slices look. Rushing leads to mistakes. You might cut yourself. You might get uneven slices. Take your time and enjoy the process.
Practice Your Grip
Hold the carving fork with one hand. Keep your other hand on the knife handle. Your knife hand should be relaxed. Tension makes your cuts shaky. A relaxed hand cuts better.
Keep Your Fingers Safe
Curl the fingers on your non-knife hand under. This protects them if your knife slips. Never put your fingers flat against the ham. Curl them under so the knife blade hits your knuckles, not your fingertips. Your knuckles are tougher than your fingertips.
Common Mistakes to Avoid
Learning what not to do helps just as much as knowing what to do.
Using a Dull Knife
This is the most common mistake. A dull knife is dangerous and frustrating. You have to push hard. Your hand can slip. The meat gets crushed instead of sliced. Always use a sharp knife. It’s safer and easier.
Cutting Too Thin
Slices that are too thin fall apart. They tear easily. They look fragile on a plate. Aim for slices that are at least half an inch thick. Three quarters of an inch is even better. Thicker slices hold together and look nicer.
Not Supporting the Meat
If you don’t use a fork or stabilize the ham, it slides around. This makes cutting dangerous. You lose control. Use a fork to hold it steady every time.
Cutting When Cold
Cold ham is stiff and difficult. It’s hard to get clean slices from cold meat. Let it sit out for thirty minutes. The meat becomes tender. Your slices improve dramatically.
Fighting the Bone
If you have a bone-in ham, don’t try to cut through the bone. You’ll ruin your knife. You’ll waste energy. Work around the bone instead. Let the bone be your guide for where to cut.
Pressing Down Too Hard
Gentle pressure works best. Let your sharp knife do the work. Pushing hard just crushes the meat. You get ugly slices with torn edges. Light pressure with a sharp blade beats hard pressure with a dull one every time.
How to Store Your Sliced Ham
After all that hard work, you want to keep your ham fresh.
In the Refrigerator
Put your sliced ham in an airtight container. It stays fresh for about four to five days in the fridge. Make sure it’s really airtight. Air makes it dry out fast.
In the Freezer
You can freeze sliced ham. It lasts for about one to two months frozen. Wrap it tightly in freezer paper or plastic wrap. Put it in a freezer bag to protect it even more. When you thaw it, do it in the fridge overnight.
Keep the Bone and Scraps
Don’t throw away the bone and leftover pieces. You can make ham broth. Just simmer the bone in water for a few hours. Add vegetables if you want. This makes a rich broth for soups. The leftover meat scraps are great in ham salad.
Using Your Sliced Ham
Now that you have beautiful slices, what do you do with them?
Serve It Fresh
The best way to enjoy sliced ham is fresh on a platter. Arrange the slices nicely. Add some garnish like fresh fruit or vegetables. It looks impressive and tastes great.
Make Sandwiches
Sliced ham is perfect for sandwiches. Stack a few slices on bread with your favorite toppings. You control the thickness, so you can make it just how you like it.
Ham Salad
Dice up your leftover pieces and scraps. Mix with mayo, mustard, and relish. You have a delicious ham salad for sandwiches or crackers.
Breakfast Scrambles
Dice ham and mix it into scrambled eggs. Add cheese and onions. You have a tasty breakfast.
Soups and Stews
Ham chunks work great in soups. Try split pea soup with ham. Add diced ham to vegetable soup. It adds flavor and protein.
Pizza Toppings
Use sliced or diced ham on pizza. It cooks quickly and adds a nice salty flavor.
Quick Reference: Cutting Ham at a Glance
For a fast reminder of the main steps, here’s a quick summary.
Get your tools ready. Use a sharp serrated knife. Use a cutting board with a groove. Get a carving fork.
Prepare your ham. Take it out of the fridge thirty minutes early. Trim the skin if you want. Set up your workspace.
For bone-in ham. Find the bone. Make cuts perpendicular to it. Rotate the ham and angle your cuts. Slice around the bone.
For boneless ham. Position it on the board. Make your first cut. Slice across the ham. Keep slices even and steady.
Keep slices thick and even. Use a wet knife. Cut in smooth motions. Keep your fingers curled under for safety.
Store extras in an airtight container. Refrigerate for four to five days. Freeze for one to two months.
Troubleshooting Your Ham Cutting
Sometimes things don’t go perfectly. Here’s what to do when problems pop up.
Your Slices Are Falling Apart
Your knife might be dull. Sharpen it and try again. Your ham might be too cold. Let it warm up for thirty minutes. You might be cutting too thin. Make thicker slices next time.
You Can’t Get Clean Cuts
Again, check if your knife is sharp. A dull knife creates torn edges. Make sure you’re using a serrated blade. The teeth help grip the meat. Use smooth, steady strokes instead of sawing back and forth too much.
The Ham Keeps Sliding
You’re not stabilizing it properly. Use a carving fork to hold it steady. Push the fork into the meat to keep it from moving. This makes everything easier and safer.
You’re Making Uneven Slices
Slow down. Take your time. Mark the ham with a knife before you start. Light cuts that show where your slices should be help keep them even. Some people use a guide to keep cuts straight.
The Ham Is Too Soft
This usually means it’s too warm or it’s already cooked too much. If it’s warm, refrigerate it for a bit. If it’s overcooked, it gets mushy. Next time, cook it less or get better quality ham.
When to Call a Professional
Sometimes it makes sense to get help from someone else.
If you’re cutting a huge whole ham and feel uncomfortable doing it yourself, ask the butcher to do it. Many butchers will slice ham for you. There might be a small charge, but it’s worth it if you’re nervous.
If you have an injured hand or arm, get help. There’s no shame in that. Safety comes first. Ask a friend or family member to do the cutting for you.
If your knife is damaged or broken, don’t try to cut ham with it. Get a new knife or have it professionally sharpened. A bad knife makes everything harder.
Final Thoughts on Cutting Ham
Cutting ham is a skill anyone can learn. You don’t need special training. You just need the right tools and a bit of patience. Your first time might take a while. That’s totally fine. Each time gets easier and faster.
The main things to remember are simple. Use a sharp serrated knife. Stabilize the ham with a fork. Let your ham warm up before cutting. Take your time. Keep your fingers safe. Learn from any mistakes.
Pretty soon, you’ll be slicing ham like someone who does it every day. Your family will be impressed. Your meals will look nicer. You’ll save money by cutting your own ham.
The next time someone asks you how to cut ham, you’ll have all the answers. You’ll be the expert. You’ll be able to guide them through the process. Share what you’ve learned.
Ham is a delicious meat that deserves to be prepared well. When you take the time to cut it properly, everyone benefits. The slices look better. The ham tastes better. The meal is more special.
So go ahead. Get yourself a nice sharp knife. Pick up a ham. Follow these steps. Trust yourself. You’ve got this. Soon you’ll be cutting ham with confidence and skill.

Mary is a home cooking enthusiast and kitchen gear reviewer with a passion for practical cookware and food preparation tools. She enjoys testing cutting boards, knives, kitchen gadgets, and other cooking essentials to help home chefs make smarter buying decisions. Through KitchenCutting.com, Mary shares honest product reviews, buying guides, and helpful kitchen tips to make cooking easier, safer, and more enjoyable.