Kitchen Knife Terminology Explained
If you have ever stood in a kitchen store staring at a wall of knives, you know how confusing the words can be. Bolster, tang, bevel, Damascus, granton edge… it sounds like a foreign language. But here is the good news: once you learn a few basic terms, the whole thing gets easy fast.
In this article
This guide breaks down every common kitchen knife term in plain words. No fancy jargon, no boring lectures. Just simple explanations so you can shop for knives, care for them, and talk about them like a pro.
Let’s dive right in.
Why Knife Terminology Matters
You don’t need to be a chef to care about knife terms. Knowing the parts of a knife helps you buy the right one, sharpen it the right way, and use it safely. It also helps you spot good quality when you shop, so you don’t waste money on a knife that falls apart in a month.
Think of this article as your cheat sheet. Bookmark it, read it once, and you’ll never feel lost in a knife aisle again.
The Basic Parts of a Kitchen Knife
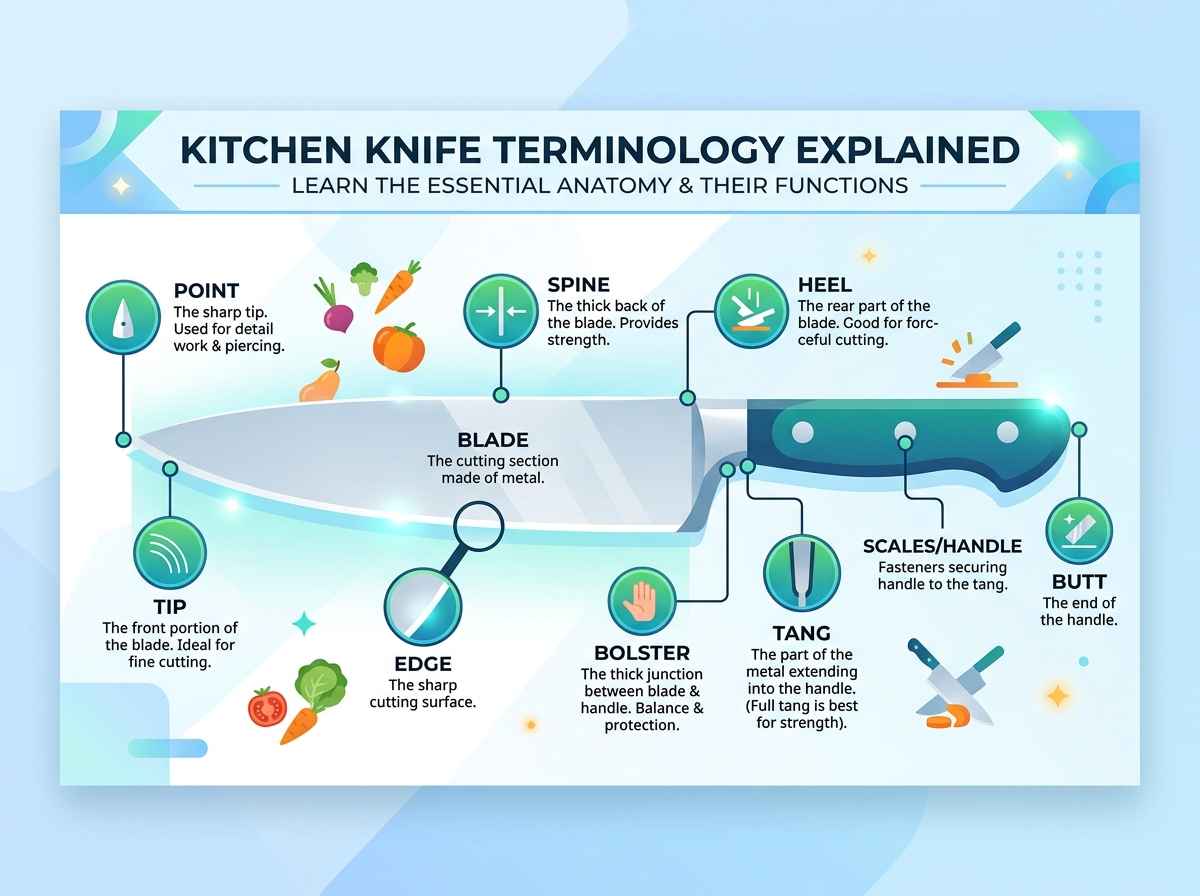
Every knife, no matter the brand or price, is made up of the same core parts. Let’s go through each one.
Blade
The blade is the flat metal piece that does the cutting. It runs from the tip to the handle and comes in different lengths, shapes, and steel types. A longer blade works well for slicing big items like watermelon, while a short blade suits small, careful cuts.
Edge
The edge is the sharp line along the bottom of the blade. This is the part that actually slices through your food. Edges can be plain (smooth), serrated (jagged like a saw), or a mix of both.
Spine
The spine sits on the top of the blade, opposite the edge. It’s the thick, dull part you can rest your finger on for extra control. A thicker spine usually means a sturdier blade that can handle tough cutting jobs.
Tip
The tip is the pointed end of the blade, farthest from the handle. It’s used for detail work like scoring meat, deveining shrimp, or making small precise cuts. Knives with a curved tip are great for rocking motions on a cutting board.
Heel
The heel is the back end of the blade, right where it meets the handle. This is the thickest and strongest part of the edge, so it’s perfect for heavy-duty tasks like cutting through bone or hard squash.
Bolster
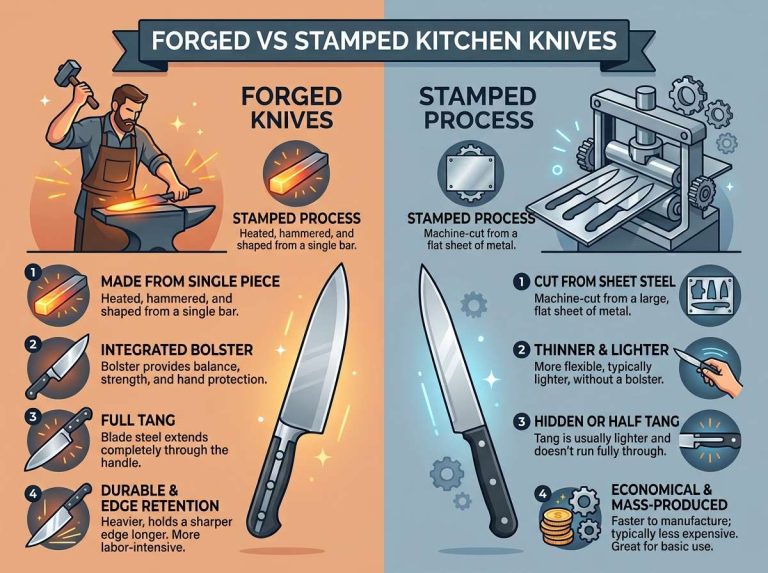
The bolster is the thick metal collar between the blade and the handle. It adds balance to the knife and protects your fingers from sliding onto the blade while you cut. Not every knife has one, but when it does, it usually signals a well-made piece.
Tang
The tang is the part of the blade metal that extends into the handle. This term comes up a lot, so let’s break it into types:
- Full tang: The metal runs the entire length of the handle, visible on both sides. This gives strength and balance, and it’s the mark of a durable, professional-grade knife.
- Partial tang: The metal extends only part way into the handle. These knives are usually lighter and cheaper, but less sturdy.
- Rat-tail tang: A thin rod of metal runs through the handle, often covered in plastic or wood. It’s common in budget knives.
If durability is a priority for you, a full tang knife is usually the safer bet.
Handle (or Scales)
The handle is the part you grip. On many knives, especially higher-end ones, the outer handle pieces are called “scales.” These are attached to the tang with rivets or pins. Handles come in wood, plastic, composite material, or even metal, and each option affects grip, weight, and how the knife feels in your hand.
Rivets
Rivets are the small metal studs you see on the handle. They hold the scales firmly onto the tang. More rivets often (but not always) mean a stronger connection between the handle and blade.
Butt
The butt is simply the very end of the handle, opposite the blade. On some knives, it’s flat and can even be used lightly for cracking nuts or crushing garlic cloves (though it’s not the ideal tool for that job).
Blade Shapes and What They Mean
Blade shape changes how a knife performs. Here are the shapes you’ll run into most often.
Drop Point
The spine curves gently down to meet the tip, creating a strong, controlled point. This shape is common on chef’s knives and all-purpose blades because it handles a wide range of tasks well.
Clip Point
The spine appears “clipped” or cut away near the tip, making the point thinner and sharper. It’s great for detailed cutting work.
Santoku Blade
This blade has a flatter edge with a slight curve near the tip, and it often features small oval dimples on the side called a granton edge (more on that below). Santoku knives are popular for chopping vegetables and slicing fish.
Nakiri Blade
A rectangular blade with a flat edge, made specifically for chopping vegetables in a straight up-and-down motion. There’s no curve, so it’s not meant for rocking cuts.
Cleaver Blade
Wide, heavy, and rectangular, this blade is built for chopping through bone and dense cuts of meat. It’s thick and tough, unlike thinner slicing knives.
Tanto Blade
Originally inspired by Japanese swords, this blade has a strong, angled tip instead of a curved one. It’s built for piercing and heavy-duty cutting.
Edge Types Explained
Not all edges are created equal. Here’s a rundown of edge styles you’ll come across.
Plain Edge
A smooth, straight edge with no teeth. Plain edges give clean, precise cuts and are easiest to sharpen. Most kitchen knives use this style.
Serrated Edge
This edge has small, saw-like teeth. It’s ideal for cutting through foods with a tough outside and soft inside, like bread or tomatoes, without crushing them.
Granton Edge
Also called a hollow edge, this style has small oval indentations along the blade sides, near the edge. These little pockets create air gaps that stop food from sticking to the blade, which is handy when slicing meat or fish thin.
Single Bevel vs. Double Bevel
The bevel is the angled part of the blade that leads to the sharp edge.
- Single bevel: Only one side of the blade is ground to an angle, while the other side stays flat. This design, common in traditional Japanese knives, creates an extremely sharp edge but requires special sharpening skills.
- Double bevel: Both sides of the blade are ground evenly, meeting at the edge. This is the standard design for most Western-style kitchen knives and is much easier to sharpen at home.
Steel and Material Terms
The metal used in a knife affects sharpness, durability, and how much care it needs.
Carbon Steel
Known for holding a razor-sharp edge for a long time, carbon steel blades are a favorite among professional cooks. The downside is that they can rust if not dried right after washing, so they need a bit more attention.
Stainless Steel
This steel resists rust and stains, making it low maintenance and beginner-friendly. It may not hold an edge quite as long as carbon steel, but it’s far easier to live with day to day.
High-Carbon Stainless Steel
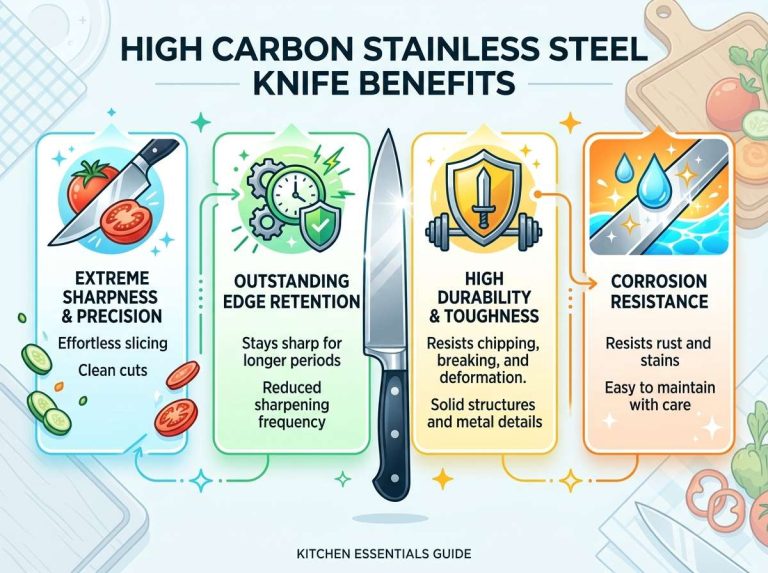
A blend of both worlds. It combines the rust resistance of stainless steel with the edge-holding strength of carbon steel. Many modern kitchen knives use this material because it offers the best of both.
Damascus Steel
This term refers to a pattern created by folding and layering different types of steel together, resulting in a wavy, marbled look on the blade. Aside from being beautiful, the layering process can also add strength and flexibility.
HRC (Rockwell Hardness Scale)
You’ll often see a number followed by “HRC” in knife descriptions, like 58 HRC. This number tells you how hard the steel is. Higher numbers usually mean the blade holds its sharp edge longer but might be more brittle, while lower numbers mean the blade is softer and easier to sharpen but dulls faster.
Common Kitchen Knife Types
Now that you know the parts and materials, let’s connect the terms to real knives you’ll see in stores.
Chef’s Knife
The all-around workhorse of the kitchen. It usually has a drop point blade, a curved edge for rocking cuts, and a length between 6 and 10 inches. If you only own one knife, this should be it.
Paring Knife
A small blade, often under 4 inches, used for peeling fruit, trimming fat, or handling small, delicate tasks close to your hand.
Utility Knife
Sits between a chef’s knife and a paring knife in size. Handy for medium tasks like slicing sandwiches or cutting small vegetables.
Bread Knife
Long with a serrated edge, built to slice through crusty bread without smashing the soft inside.
Boning Knife
Thin and flexible, made for removing bones from meat or fish with precision.
Cleaver
As mentioned earlier, this heavy rectangular blade handles bones and thick cuts with ease.
Santoku and Nakiri Knives
Both come from Japanese kitchen tradition and focus on clean, precise vegetable prep.
Sharpening and Maintenance Terms
Owning a knife means learning how to care for it. These terms come up often in that context.
Honing
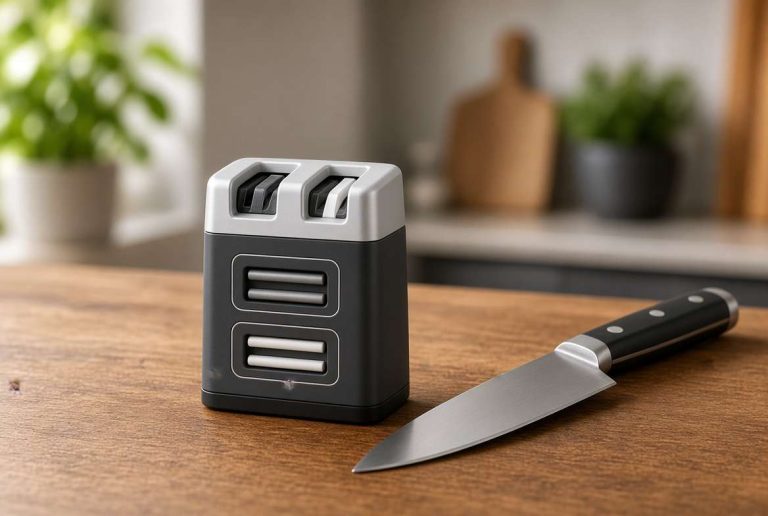
Honing straightens a blade’s edge that has bent slightly out of place from regular use. It doesn’t remove metal like sharpening does; it just realigns the edge. A honing rod (also called a honing steel) is the tool used for this quick task, ideally done before or after each use.
Sharpening
Sharpening actually removes a thin layer of metal to create a new, sharp edge. This is done less often than honing, maybe every few months depending on how much you cook.
Whetstone
A flat sharpening stone soaked in water (or sometimes oil) and used to manually sharpen a blade by dragging it across the surface at an angle. It takes practice, but it gives excellent results.
Strop
A strip of leather or fabric used after sharpening to polish and smooth the edge even further, giving it that final razor-sharp finish.
Knife Angle
This refers to the angle at which the blade meets the sharpening tool. Western knives are typically sharpened around 20 degrees per side, while many Japanese knives use a sharper 15-degree angle. Getting this angle right keeps the edge sharp and even.
A Few Extra Terms Worth Knowing
Balance Point
This is the spot on the knife where it sits evenly when placed on one finger, usually right around the bolster or the front of the handle. A well-balanced knife feels natural and reduces hand fatigue during long prep sessions.
Kullenschliff
Another name for the granton edge (those little oval dimples), often used in European knife descriptions.
Blade Length
Simply the distance from the tip to the heel of the blade, not counting the handle. This measurement helps you compare knives when shopping online.
Blade Stock
Refers to the thickness of the metal before it’s ground into a blade shape. Thicker stock generally means a sturdier, heavier knife.
Distal Taper
A gradual thinning of the blade from the heel toward the tip. This design makes the knife feel lighter near the point, improving control for detail work.
Wrapping It All Up
Kitchen knife terms don’t have to feel like a secret code anymore. Once you know the difference between a bolster and a tang, or a plain edge and a granton edge, shopping for knives becomes simple and even a little fun. You’ll be able to read product descriptions with confidence, ask smart questions at the store, and take better care of the knives you already own.
Start by getting familiar with the basic parts: blade, edge, spine, tip, heel, and tang. From there, learn the blade shapes and steel types so you know what fits your cooking style. And don’t skip the maintenance terms, since honing and sharpening keep your knife safe and effective for years to come.
The next time someone mentions a “full tang chef’s knife with a Damascus pattern and a 15-degree double bevel,” you’ll know exactly what they mean, and you’ll sound like you’ve been cooking for decades.
Happy chopping!

Mary is a home cooking enthusiast and kitchen gear reviewer with a passion for practical cookware and food preparation tools. She enjoys testing cutting boards, knives, kitchen gadgets, and other cooking essentials to help home chefs make smarter buying decisions. Through KitchenCutting.com, Mary shares honest product reviews, buying guides, and helpful kitchen tips to make cooking easier, safer, and more enjoyable.